How to Use the IF Function in Excel
When you’re using Excel, it’s easy to be daunted by formula and function. This is especially true when you have just started using it for your data. However, once you get the hang of it, you will see how helpful Excel can be, especially when it comes to making sense out of a large amount of data. One of the most popular and widely used functions in Excel is the IF function. This function allows you to make comparisons in your data, with True or False results.
The IF Function in Excel – How to use it?
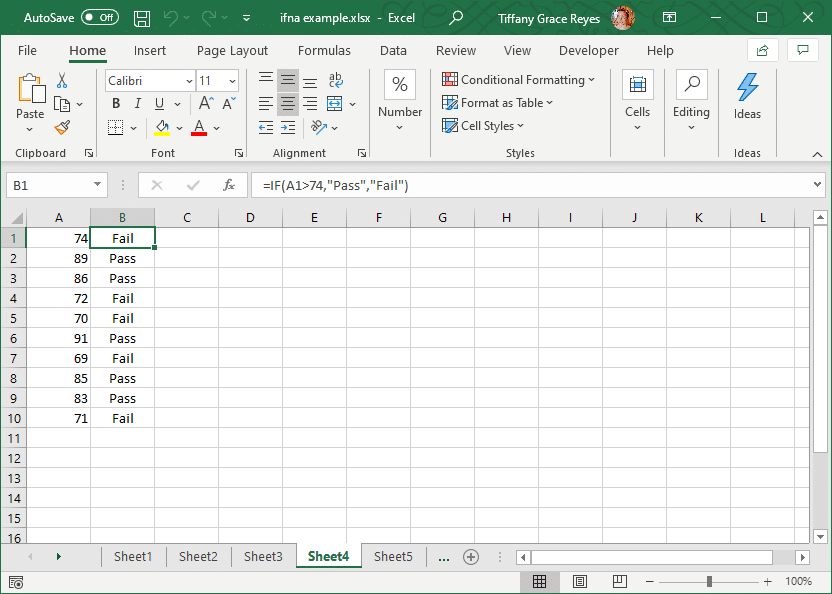
The IF function in Excel can perform logical tests and can return either a TRUE or a FALSE value. For example, to set passing scores for those scores that are 74 and above:
=IF(A1>74,”Pass”,”Fail”)
Like the example in the image below.

Other Examples for IF Function in Microsoft Excel
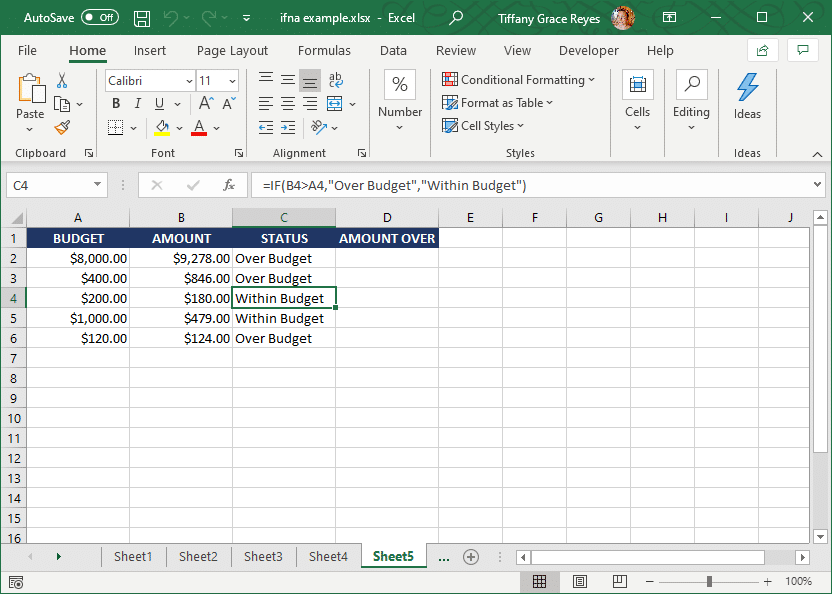
There are also many other applications for the IF function for all kinds of computing and data management and analysis. In this next example (in the image below), we are computing how much the spending in each item may be within budget or over budget.

IF Function Examples in Everyday Life
IF functions have many applications in business and even in everyday life. In managing and organizing, even analyzing data, the IF function can greatly help you make better sense of the information that you have. In our budgeting example above, we have shown how the IF function can be used to determine if certain data sets fall within a given category or condition. This helps analysts and managers make better decisions with the amount of data that they have. Creating an IF function helps automate the process and make decision-making so much easier.
Once you get the hang of it, you can see that you can even create multiple IF statements in Excel for more complex computing. By practicing on these basic functions, you can see how easy it is to analyze your data in a way that is simple and easy to understand.
