How To Save a PowerPoint Shape to PNG with 100% Transparent Background
Saving PowerPoint presentations to image is something that we could do if we want to use the slides as images. However, in some situations, we’d like to save a shape as an image and keep the 100% transparent background.
The bad news is that saving PowerPoint to images option (in the File dialog) won’t allow us to save a transparent background when saving the slides. But the good news is that we can use the Save As Picture option in a graphic or shape to save it with 100% transparency.
For this example, let’s consider one of the templates available at SlideModel.com, one of my favorites PowerPoint templates providers. They provide high-quality PowerPoint templates that are 100% editable so the presenter or designer gain “complete control” to customize the slides for their own needs. This is definitely one of the main advantages of using editable templates and graphics created with PowerPoint shapes vs. other providers or even free PowerPoint templates that are not editable.
In this example, I’d like to export a world map graphic with 100% transparency so we can later use it to compose another graphic, in this case using Photoshop but could be in any other graphic tool or for any other purpose.
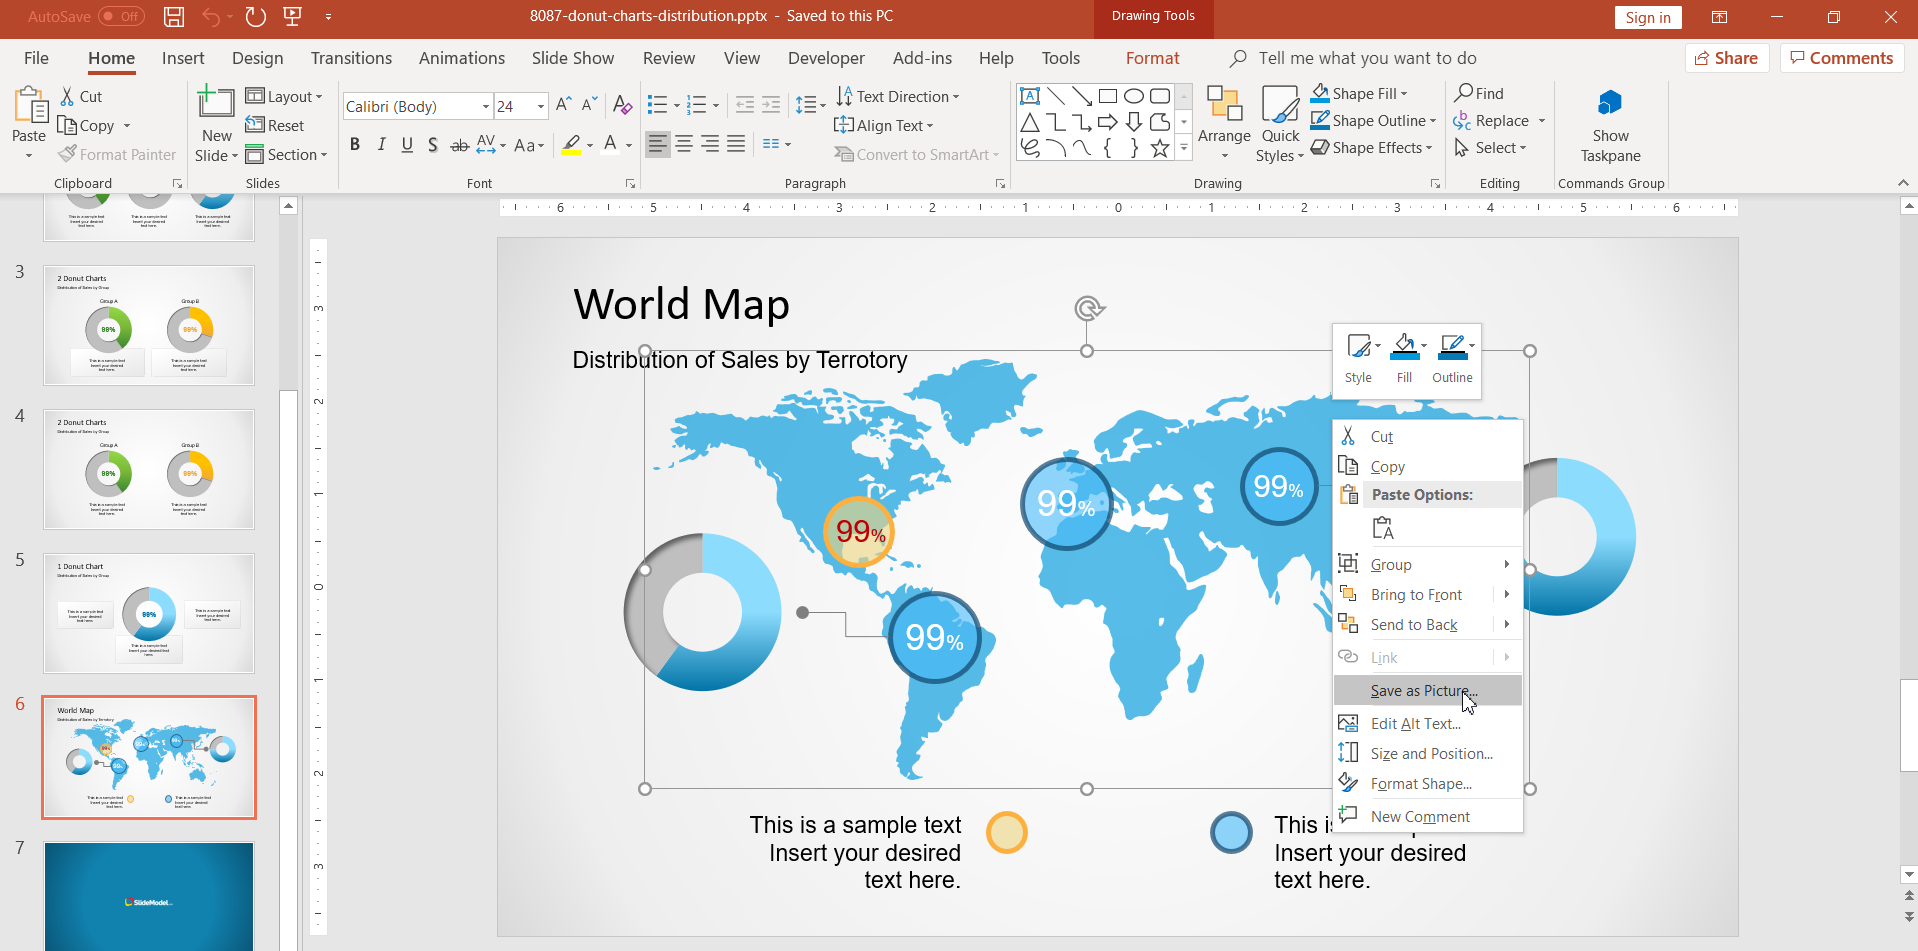
Having the graphic selected, we can right click over the graphic or shape and then choose “Save as Picture…” option in PowerPoint.

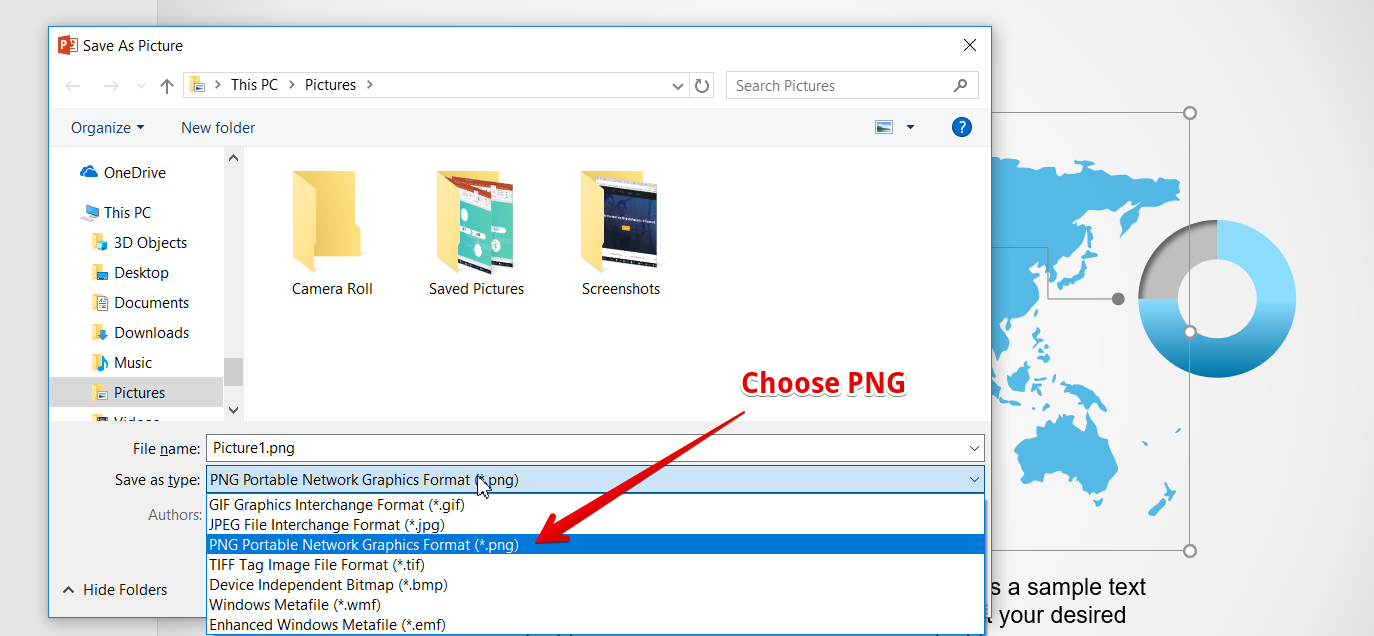
A new File dialog will appear where you can specify the output directory and file name to use. Here, you’d need to choose PNG Portable Network Graphics Format *.png as the save as type option.

Once saved, the output image will preserve the transparency and this could be used in any other graphic. In this case we are going to use it to prepare a new graphic in Photoshop, as shown below.
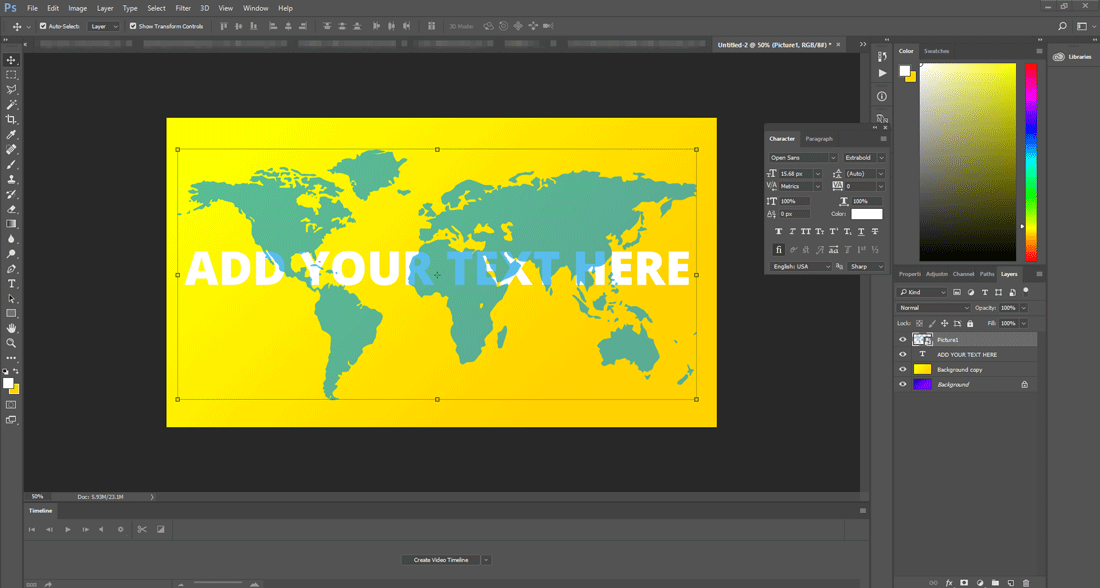
For this purpose, I inserted the PNG image with transparent into a new image that I was creating in Photoshop and as you could see, the world map is keeping the full transparency and inserted as a new layer in the Photoshop editor.

Here is the resulting image after editing it in Photoshop.

Exporting PowerPoint Slides with Transparency
This same technique works for other kind of graphics, for example if you have some shapes selected like shown in the image below.

This solution was originally presented in Stackoverflow here. and as stated in the post, the technique also works for Word Art graphics, that means you can use PowerPoint to create some slides with text effects created with Word Art and then export it to use in any other tool, too. It is important to notice that this technique works very well in recent version of PowerPoint. If your version of PowerPoint is older than any of these versions, it is advised to upgrade your copy of PowerPoint as you might have been missing some other nice options like the 3D PowerPoint graphics or Morph transition effects.
