How to Make a Photo Album in PowerPoint
Creating a photo album in PowerPoint is a fantastic way to preserve and present your cherished memories. Whether it’s a family gathering, a vacation, a wedding, or any other special event, a photo album in PowerPoint allows you to create a visually appealing and engaging presentation. In this article, we’ll guide you through the process of creating a photo album in PowerPoint, highlighting the benefits and real-life applications of using this versatile tool.
Why Creating a Photo Album in PowerPoint?
Creating a photo album in PowerPoint offers numerous benefits, from easy customization to professional-looking presentations. This guide will walk you through the steps to create your own photo album using PowerPoint, providing tips and best practices along the way.
How to Make a Photo Album in PowerPoint? (Step by Step Guide)
To create a photo album or picture collage in PowerPoint, first open PowerPoint and set up a new presentation. You can either choose a suitable photo collage PPT template from the available free PowerPoint templates or start with a blank presentation. Using a photo album PPT template can save you time and provide a cohesive look to your photo album. You can also apply a theme (.thmx) file to the photo album and change the layout, as we will see later in this article.
Inserting Photos into the PowerPoint Photo Album
PowerPoint’s Photo Album feature makes it easy to insert multiple photos into your presentation. Follow these steps:
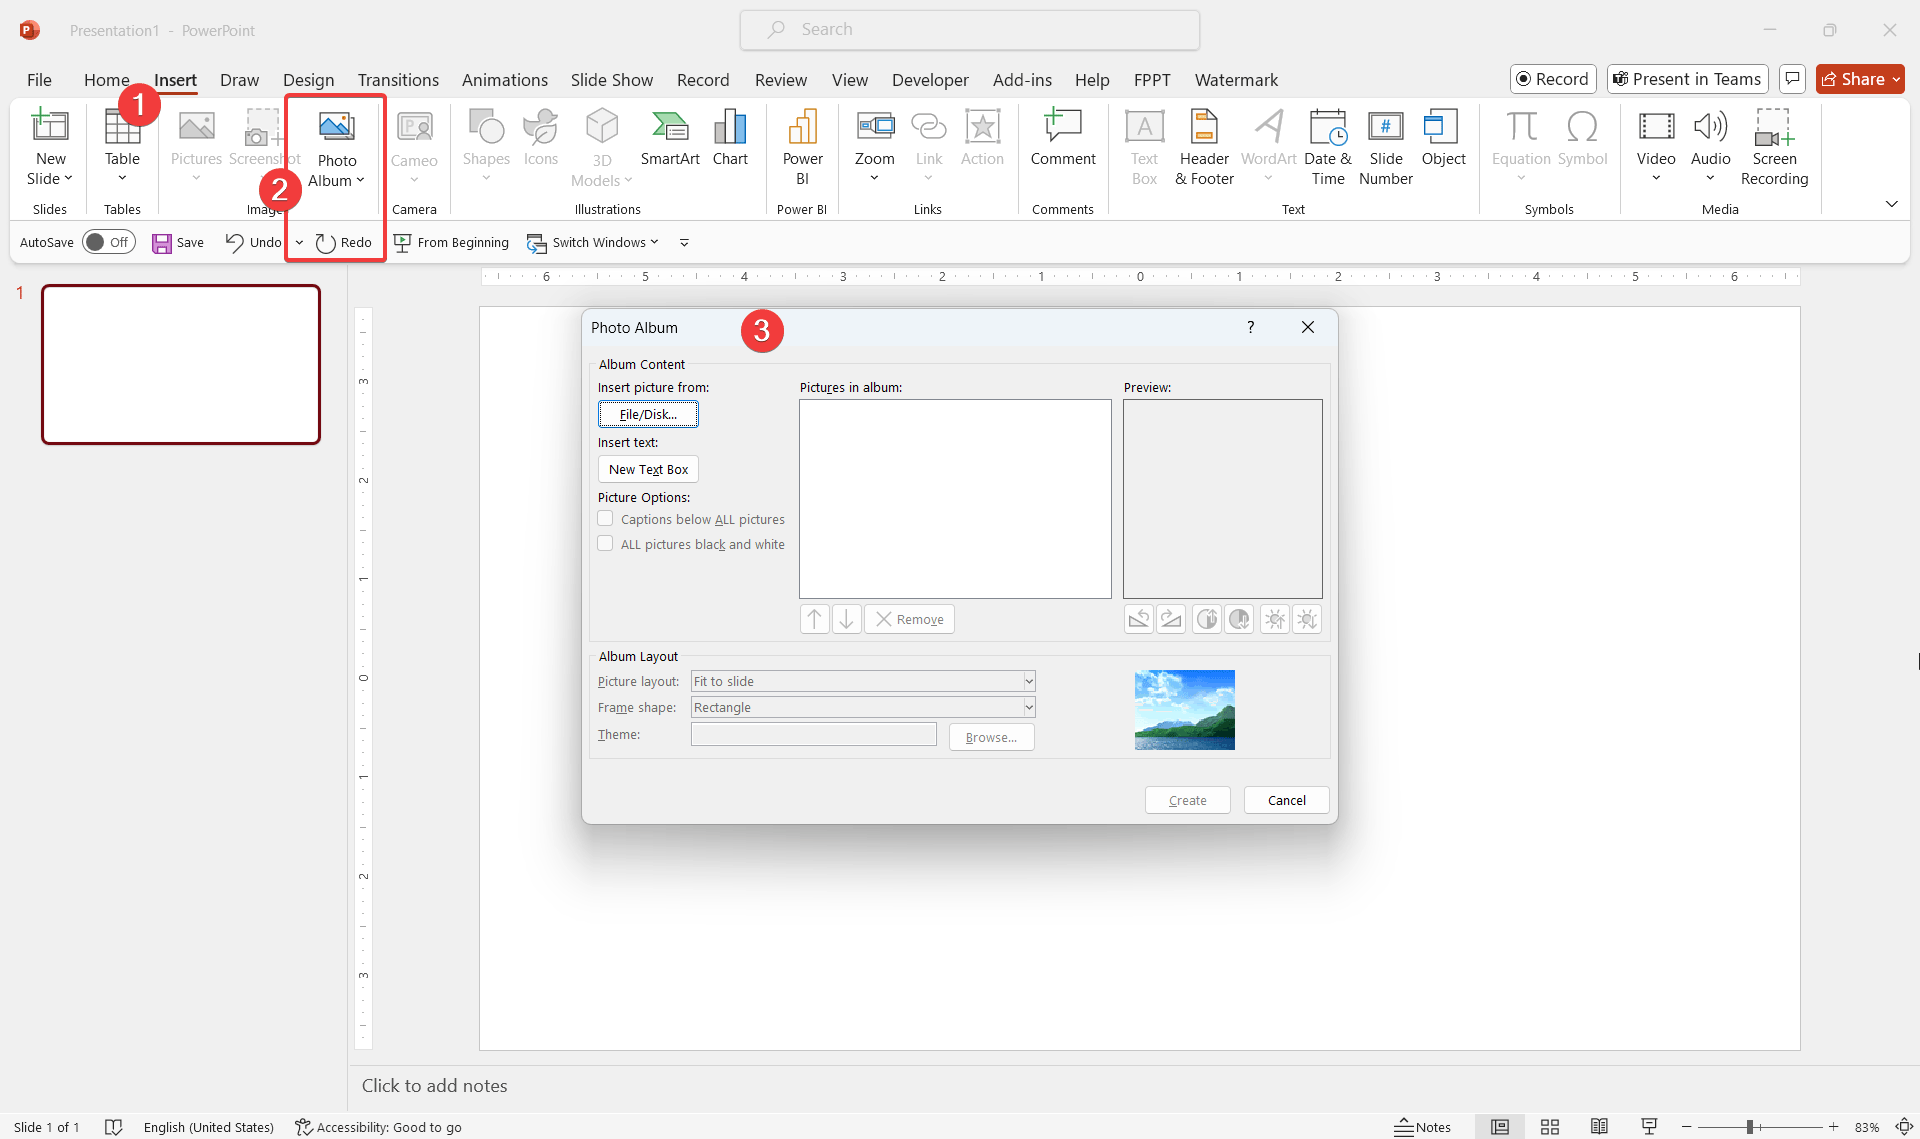
- Go to the Insert tab and click on Photo Album.
- Select New Photo Album.
- Click File/Disk to browse and select the photos you want to include.
- Arrange the sequence of the photos by using the Up and Down buttons.
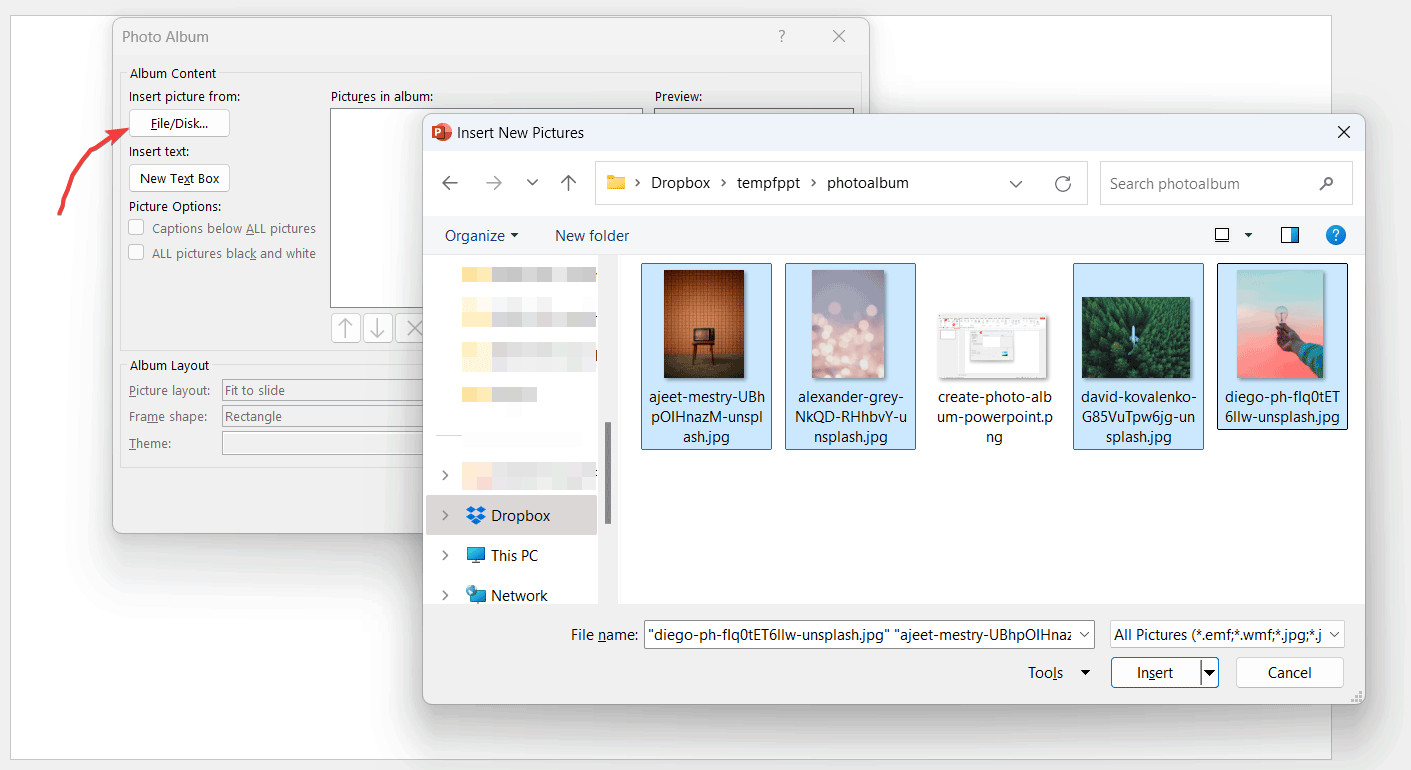
When you browse for photos for your photo album, you can choose from a variety of photo formats, including popular image formats like .emf, .png, .jpg, etc.
For the sake of this demonstration, we have selected photos for a demo photo album we are creating. In the following screenshot we can see how the selected files are listed in the Pictures in album list. As you can see, these photos are listed in a specific order.
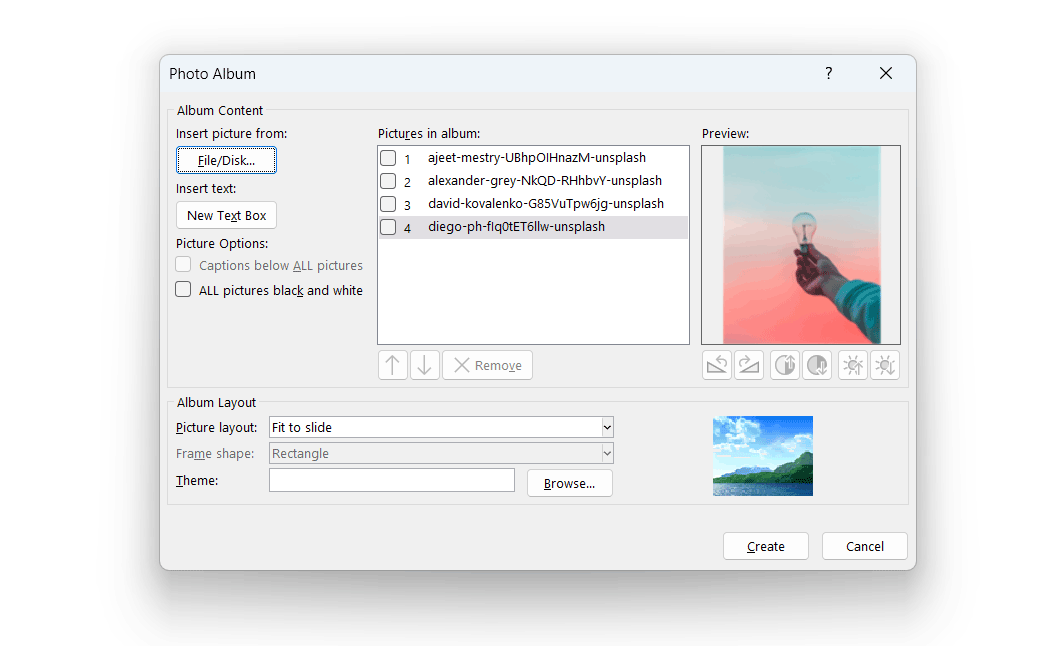
From here, you can re-arrange the order of the photos by selecting the photo and moving it down or up. You can also remove the photo from the gallery if you added one by mistake.
Customizing the Photo Album & Picture Collage
After inserting your photos into the photo album slideshow, you can customize your photo album to enhance its appearance:
- Choose photo layouts and themes that suit your style.
- Add captions to your photos by selecting the Captions below ALL pictures option.
- Apply different styles and effects to your photos by using the options available in the Photo Album dialog box.
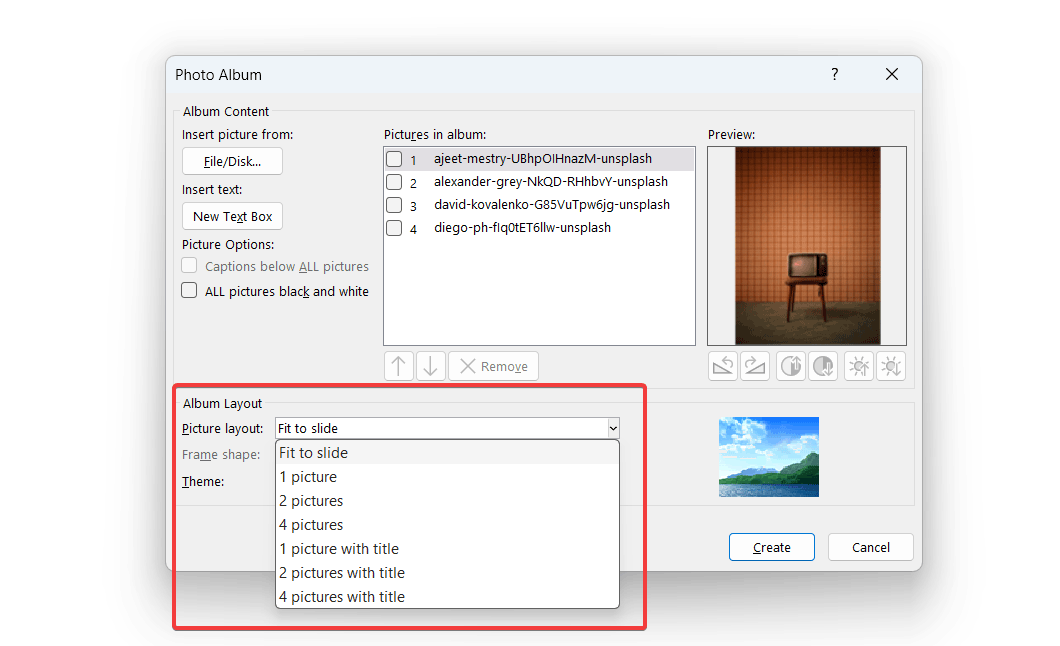
You can choose the Picture layout to use. Typically, you’d insert one photo per slide (Fit the photo to the slide), but you’d also have the option to customize this and include 1 picture, 2 pictures, 4 pictures, or variants with titles. The Fit to Slide option will be enough if you are thinking of inserting multiple pictures into PowerPoint on separate slides.
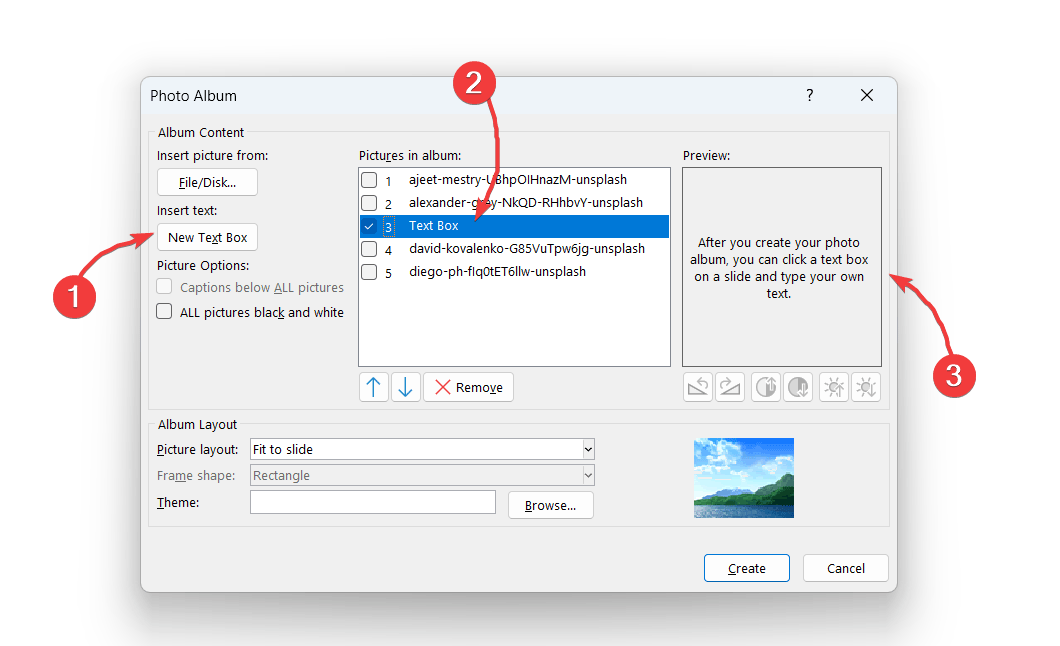
You can also insert text boxes into the photo album. This is great for example if you need to have different sections and chapters. Perhaps you are creating a travel photo album and want to separate your photos by regions visited, or if you are creating an Anniversary photo album in PowerPoint you may be interested in adding a title slide first.
Enhancing Your Photo Album
To make your photo album more engaging, consider adding the following elements:
- Text Boxes and Shapes: Add text boxes for additional information or shapes to highlight specific photos.
- Transitions and Animations: Use transitions and animations to create a dynamic slideshow. Go to the Transitions tab to select and apply various transition effects between slides.
- Background Music or Audio Narration: Insert background music or record audio narration to add an auditory element to your photo album. Go to the Insert tab and select Audio.
Before sharing your photo album, review and edit it to ensure everything is in order. Here are some tips that will help you to keep everything on flow.
- Check for consistency in design and layout.
- Make any necessary adjustments to photo placement or captions.
- Save your photo album as a PowerPoint file or export it as a PDF for easy sharing.
Examples and Use Cases:
- Family Gatherings: Create a photo album to share memories from family reunions, holidays, and special occasions.
- Travel Diaries: Document your travels with a photo album that includes pictures, captions, and maps of the places you’ve visited.
- Wedding Albums: Compile wedding photos into a beautiful album to share with friends and family.
- Business Portfolios: Use photo albums to showcase your work or portfolio in a professional manner, perfect for presentations and client meetings.
Tips and Best Practices
To create an effective and visually appealing photo album in PowerPoint, consider the following tips:
- Select and Organize Photos: Choose high-quality photos and organize them in a logical sequence.
- Design Consistency: Maintain a consistent design throughout the photo album for a cohesive look. For this purpose, you may use slide templates from FPPT.
- Less is More: Avoid overcrowding slides with too many photos or text. Apply the KISS Principle in presentation design and keep it simple and focused.
Conclusion
Creating a photo album in PowerPoint is a fun and creative way to present your memories. By following the steps outlined in this guide, you can create a personalized and professional-looking photo album. Experiment with different features and designs to make your photo album unique.