How To Install Windows 10 On VMware
Microsoft has recently released the latest version of Windows 10 and I bet many of you want to take it for a test drive. The thing about testing a preview or trial build is that it can end up having a lot of bugs and is not ideal for replacing your default operating system. This is why making a virtual machine is a common practice among IT pros who like to explore the various new features of an operating system or to use an OS as a secondary virtual machine.
In this post we will show you how to create a virtual machine by installing Windows 10 on VMware Workstation. For the purpose of this post, we will use the VMware Workstation version 10 and install Windows 10 x64 on it.
Note: The system used to demonstrate the below mentioned process is a Dell Inspiron 15 laptop, which has a Core i3 4th Generation (Haswell) processor and 4GB RAM.
System Requirements: The system requirements for the below mentioned process see the Windows 10 System Requirements. You will also require “Virtualization” to be enabled on your computer. To verify if Virtualization is enabled, go to your BIOS settings.
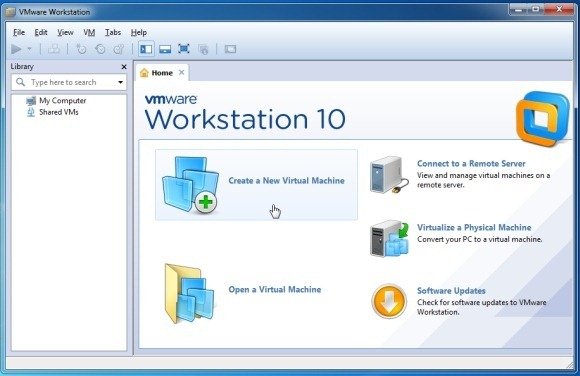
Step 1: Launch VMware Workstation 10 and click Create a New Virtual Machine.
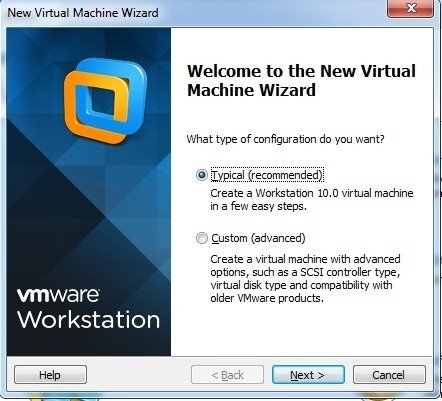
Step 2: From the setup wizard, select Typical Settings.
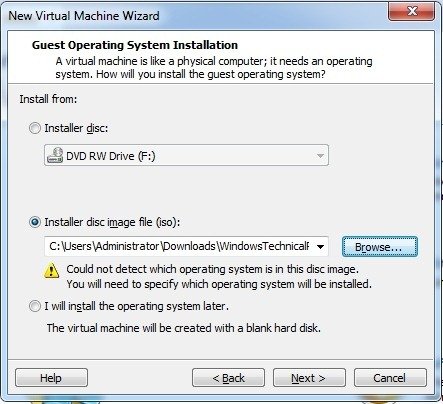
Step 3: Select the Windows 10 ISO as the disc image. If you have downloaded a Windows 10 trial version from the Microsoft website, it will already be in ISO format.
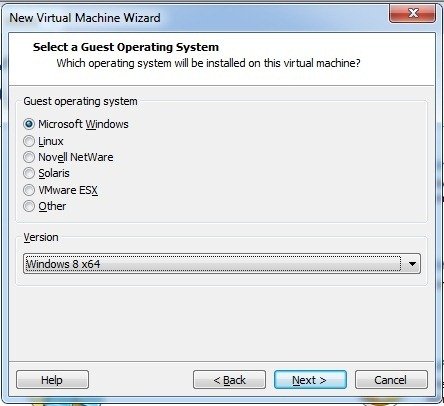
Step 4: When selecting an operating system, select Windows 8. This is because VMware Workstation 10 currently does not contain a Windows 10 category. However, that might change with an update or a newer version might come with a Windows 10 option. Nonetheless, you can install Windows 10 by selecting Windows 8 from the OS list. If you have a 64-bit Windows 10 ISO, pick the Windows 8 x64 version and for the 32-bit version, pick the Windows 8 option.
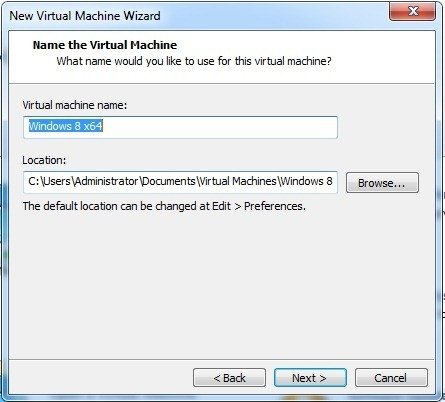
Step 5: Pick a location to save your virtual machine. Usually, the default path is the C drive. It is not recommended to save the machine to your primary drive, since it is easier to suffer data loss in case you require a wipe and load installation.
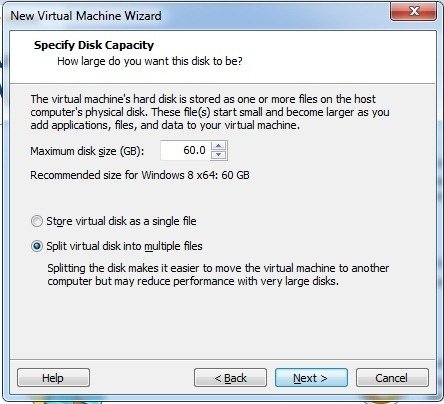
Step 6: It is recommended to dedicate at least 20 GB of hard disk space to run Windows 10 in a virtual environment without hiccups. You can also allocate more space, especially if you require running additional apps in a virtual environment (e.g. you might require testing applications).
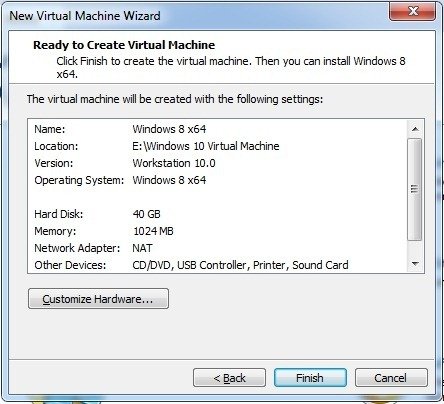
Step 7: After verifying that all settings are appropriately selected, click Finish.
Step 8: In the next step, click Edit Virtual Machine Settings.
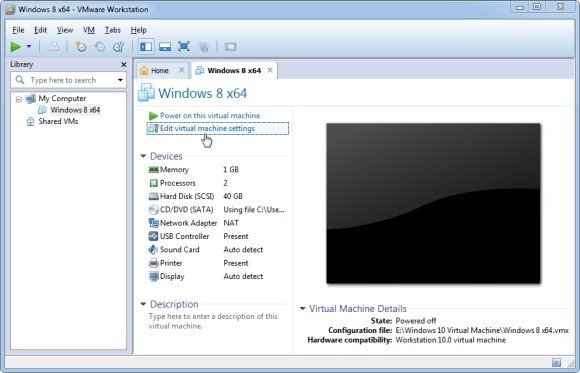
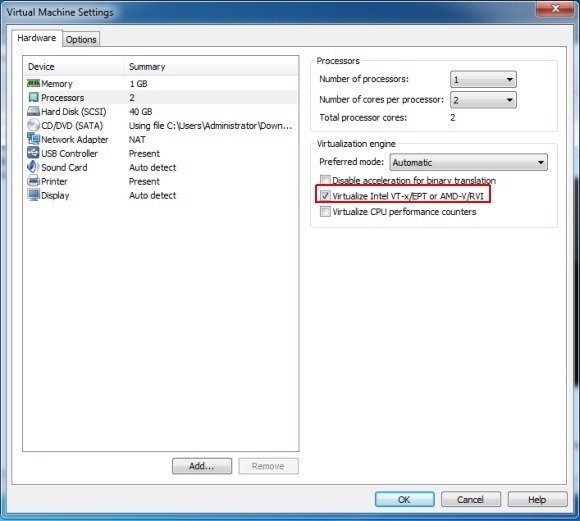
Step 9: Go to the Processor and enable “Intel-VT-x/EPT or AMD-V/RVI”. You can pick a processor and core combination depending upon your hardware. For example, for a Core i3 you can dedicate 1 core with 2 processors. The more hardware you allocate, the slower the host system will work, so allocate your hardware wisely. In terms on RAM usage, you can allocate 1-2GB RAM but make sure that your PC has at least 4GB RAM so that the rest can be utilized by it.
To enable smooth internet connectivity for your virtual machine, pick NAT. For now, your virtual CD/DVD drive will be your ISO disc image from which the OS will be installed, however, you can also add additional virtual drives to your virtual machine if you like.
Step 10: Once the virtual machine settings have been configured, exit the settings by clicking OK and hit Start up this guest operating system (Play Button) to start the Windows 10 installation.
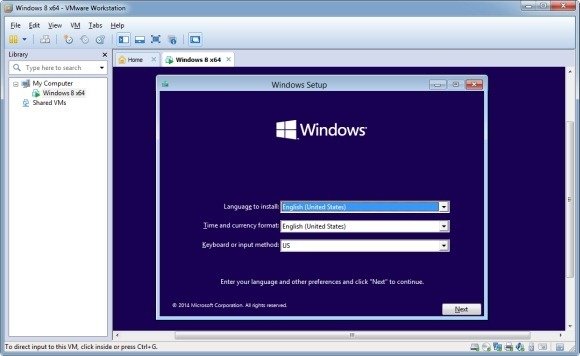
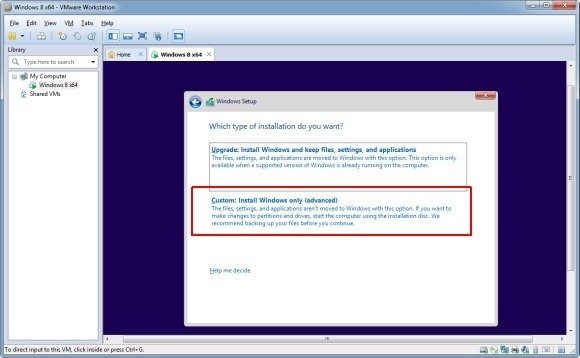
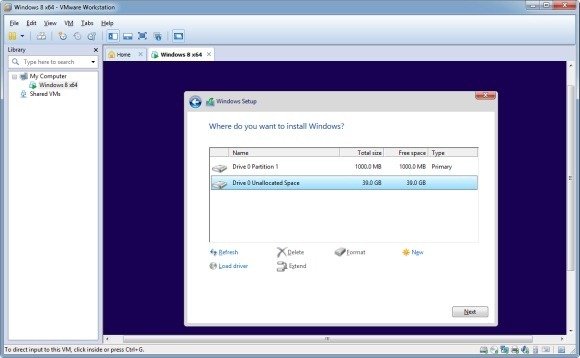
The rest of the installation process is similar to what you would expect when installing a Windows OS. One thing that might appear confusing to end users is the Upgrade Vs Custom install option. Just hit Custom: Install Windows Only, since there will be nothing available to upgrade.
You can also create additional drives on your virtual machine, depending upon your work requirements.
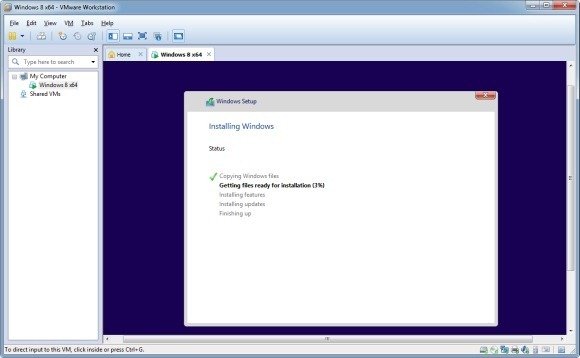
The installation process might take 20 minutes to an hour to complete, depending upon the allocated hardware and the capacity of your system’s hardware.
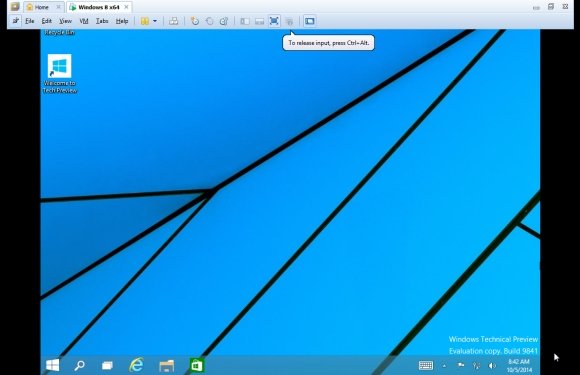
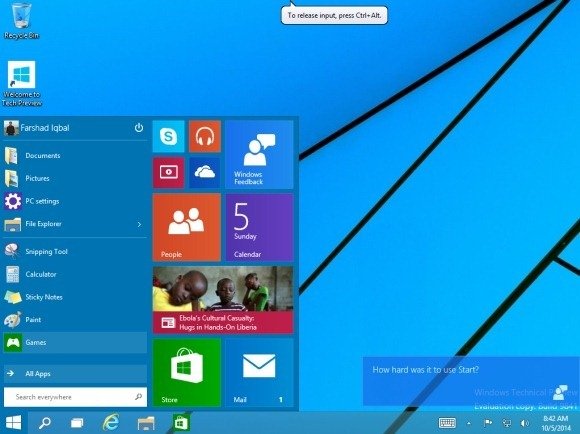
The below image shows Windows 10 installed on VMware Workstation 10.
We will send you our curated collections to your email weekly. No spam, promise!
