How to Insert a Line in PowerPoint
Last updated on April 10th, 2024

Lines are very useful to design diagrams, charts or just remark some ideas. You can also use lines to separate concepts or content in your presentation slide or you can also make awesome arrows with lines. In PowerPoint you can insert lines easily using shapes.
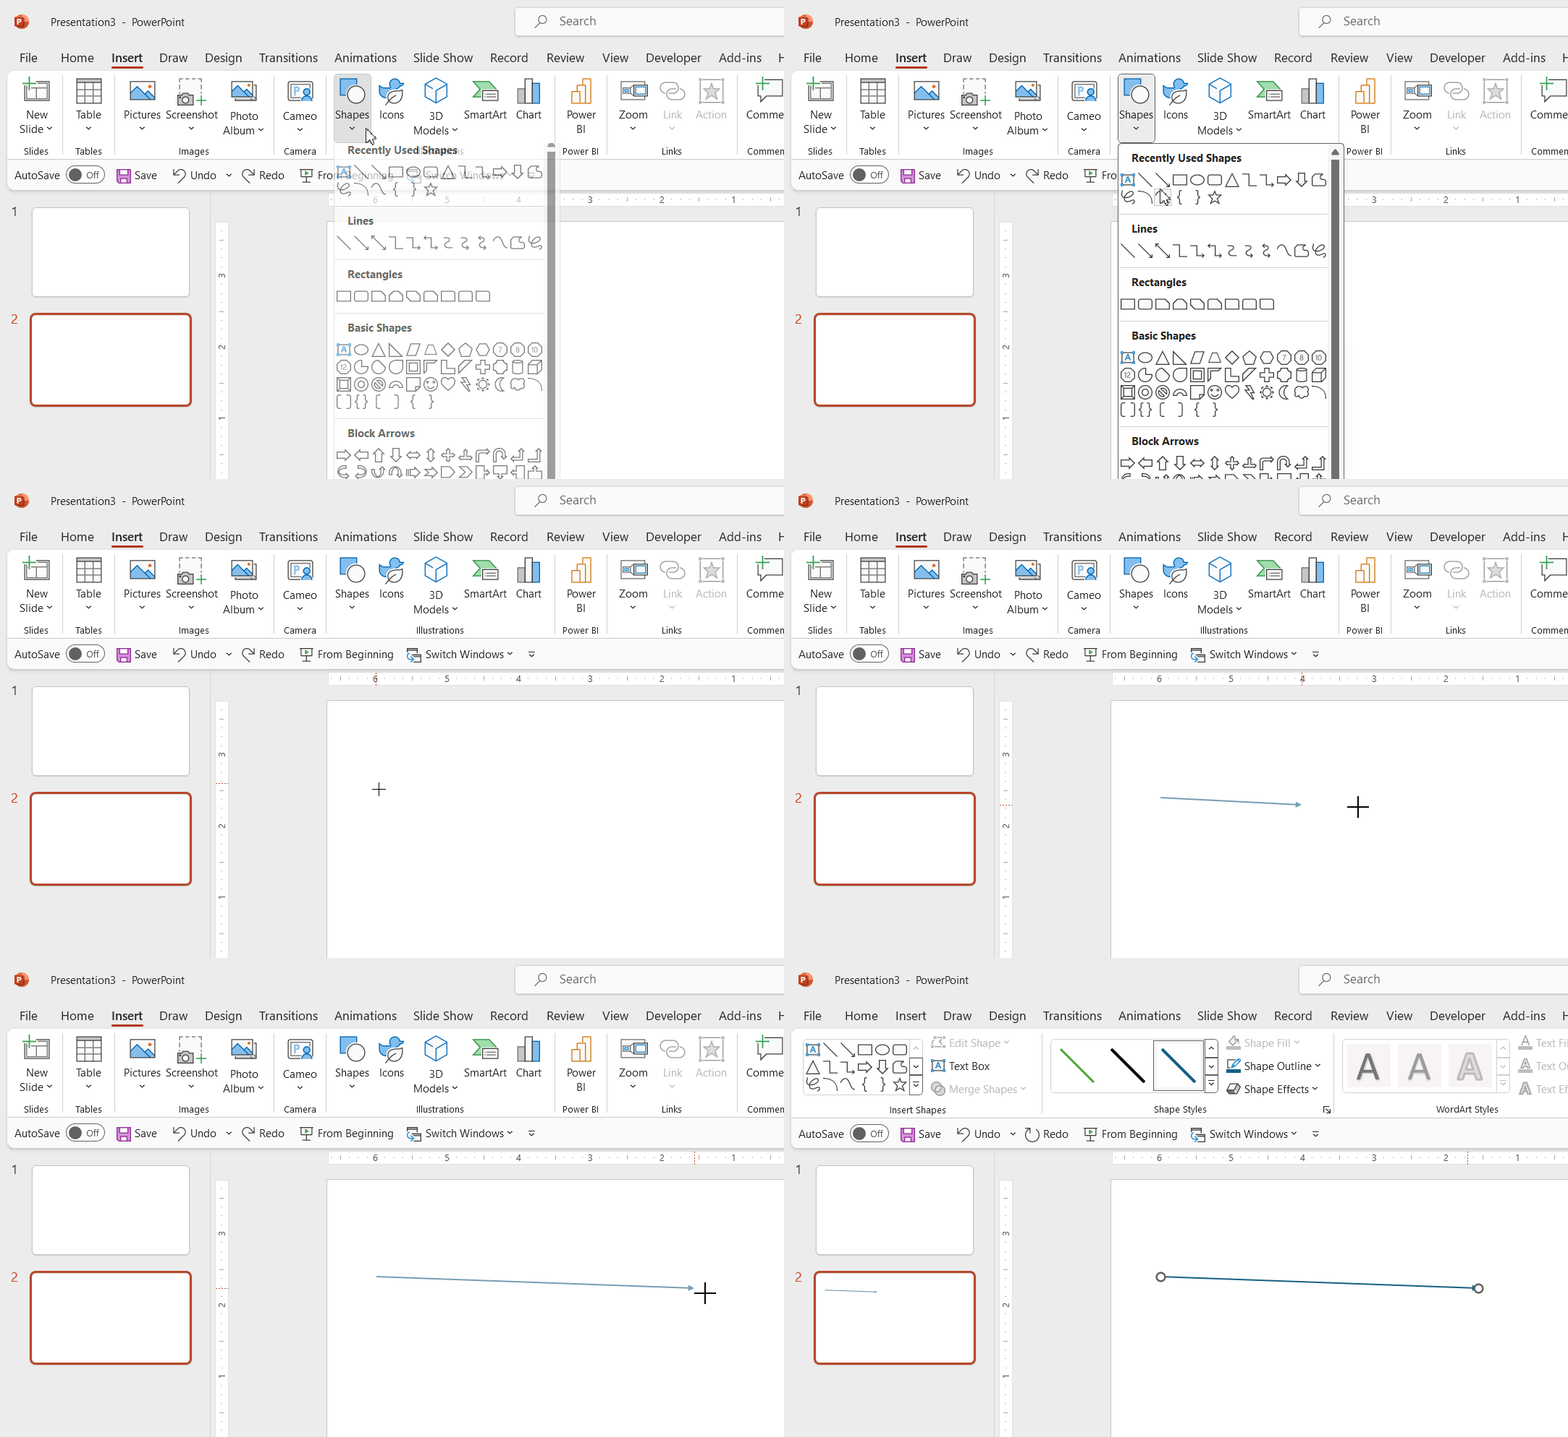
To insert a line in PowerPoint just need to go to Insert -> Shapes -> Line. Now draw the starting point and end point. Then you can apply special line styles for example to change the line color or the line width.
Quick Tip: If you want to draw horizontal or vertical lines, just keep pressed the Shift key while drawing the line. This tip can also be used to draw diagonal lines in PowerPoint. Once the line is inserted in the slide, if you keep the Shift key pressed while dragging any of the end points, you can enlarge the line without changing the orientation or current line rotation.

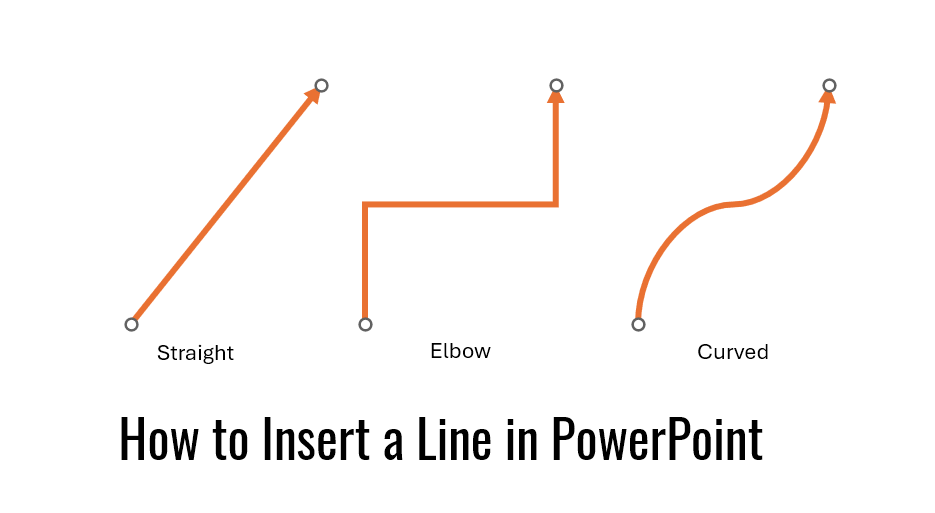
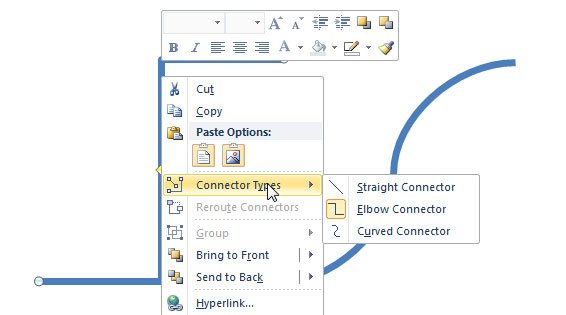
Even simple lines in PowerPoint has special properties. When you draw a line in PowerPoint you can right click to choose the line conenctor type. This let you change the way connectors are used in the line. For example you can use curve line connector, elbow connector or straight connector.

While the examples above show different types of lines, PowerPoint also allows to set the dash type. In the image below, we created a simple comparison between the different dash line types available when inserting a line into a PowerPoint slide.

Here is an example showing where you can change the connector types.

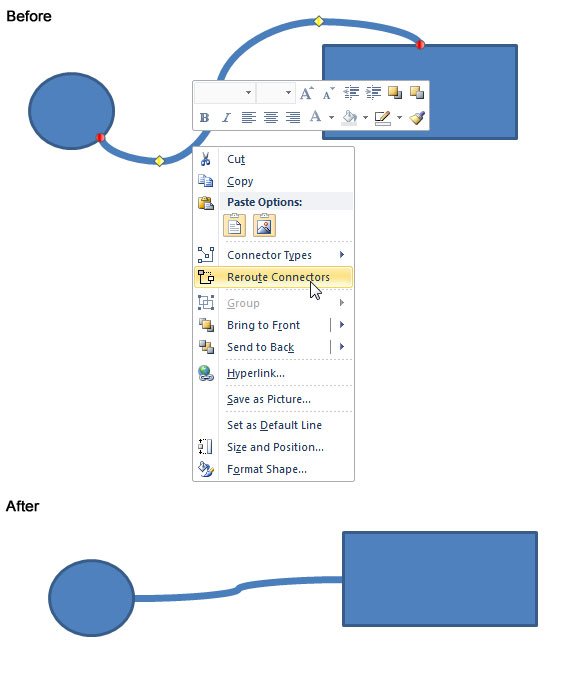
If your lines are connected to objects, you can also enable Reroute Connectors option, which will help to reorganize the way objects are connected with lines.

Remember that if you need free PowerPoint templates you can download free PPT templates from our website, including this free line PowerPoint template. Simple Line PowerPoint template is a fresh and free PPT background that you can download with gray lines and background.
