How to Draw Basic Geometry Shapes in PowerPoint
Last updated on December 26th, 2024
PowerPoint has a shapes feature that allows you to easily draw geometry shapes on any PowerPoint presentation or PPT template.
PowerPoint drawing tools make it easy to draw geometry shapes for school and classroom, but also for other business purposes or any general need. To draw a geometry shapes on your PowerPoint slide, follow these steps:
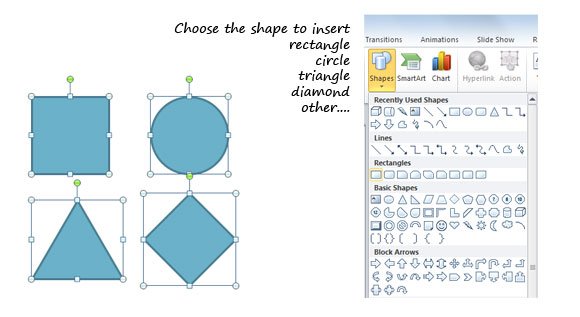
Go to Insert tab and then look for the Shapes. Here you will find a list of available shapes, but focus on the geometry shapes that you are interested to use. For example, here you can find rectangles (square), ellipses and circles, triangles, diamond shapes, and more.

If you want to make a perfect square you can use the rectangle shape and then hold the SHIFT key while drawing it in the presentation slide. This will keep width and height proportions. The same applies for any other geometry shape that you want to draw.
Here is a list of shapes that you can draw in PowerPoint using the shapes feature:
- Squares
- Rectangles
- Triangles
- Rhombus
- Spiral
- Diamond
- Parallelogram
- Hexagon
- Pentagon
- Any other shape
Besides basic geometry shapes you can also draw arcs and conjectures in geometry like inscribed angles.
Some other complex geometry shapes can be drawn, for example you can draw a polygon using the polygon shape option but if you need any other shape not displayed in the list you can combine multiple shapes using set operations like union, intersection, subtract.
Alternatively, you can create irregular shapes or odd shapes for your presentations, as well as organic shapes which are quite popular in modern presentation backgrounds.
