How to Create Text Columns in PowerPoint
Creating engaging and visually captivating presentations with PowerPoint goes beyond simple text and images. With its robust features and user-friendly interface, PowerPoint offers numerous ways to make your slides more effective, engaging and useful. One such feature is the ability to divide the text in a textbox into columns. This article will guide you through the step-by-step process of inserting columns into a textbox in PowerPoint.
Method #1: Adding Columns to Text Boxes in PowerPoint
Steps to Insert Columns in a PowerPoint Textbox:
Launch PowerPoint and Open Your Presentation: Begin by opening the PowerPoint application. Once the software is running, select and open the presentation file where you want to insert columns.
Navigate to the Relevant Slide: Move to the specific slide where you wish to insert columns in a textbox. You can do this by clicking on the thumbnail slide in the sidebar.
Create or Select a Textbox: If you have an existing textbox, select it by clicking on the textbox’s border. If you need to create a new one, click on the “Insert” tab in the PowerPoint toolbar, select the “Text Box” option, and draw your textbox on the slide.
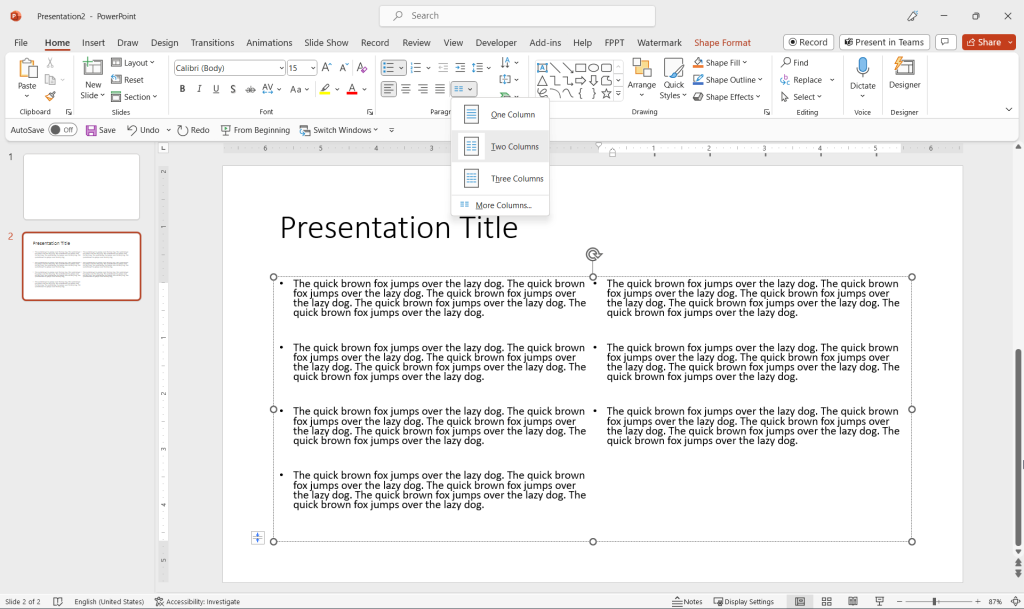
Open the Home tab in the PowerPoint Ribbon. Here you will see a small icon to Add or Remove Columns. Refer to the following screenshot to locate this icon in the PowerPoint editor. Having the shape selected, click on the columns icon to change the textbox to use a different number of columns (One Column, Two Columns, Three Columns).

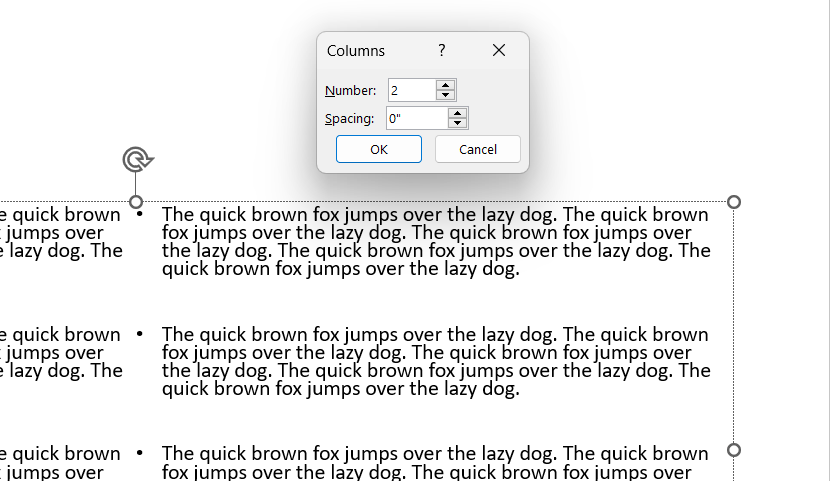
You can also click More Columns to customize to any desired number of columns besides the pre-defined ones.
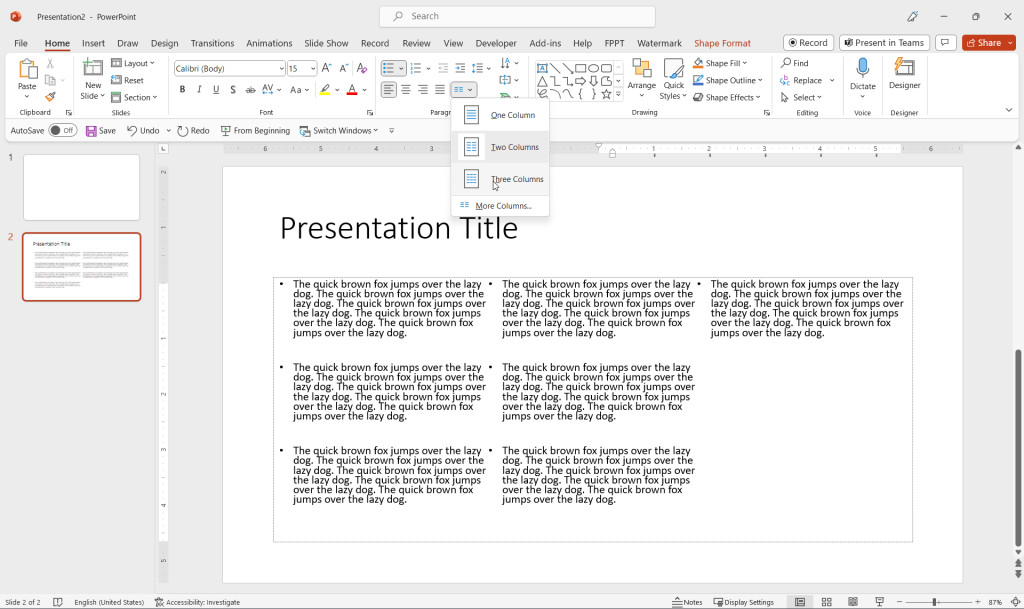
In the following example, we show you how to use three columns instead of two columns.

Customize Your Columns: If you prefer to customize the columns, you can configure the number of columns and the spacing between columns. Once you have customized your columns as desired, click “OK” to apply the changes.

Verify and Adjust: Your textbox should now have the desired number of columns. If you want to make adjustments to the column widths or the spacing, simply repeat the steps.
Method #3: Use a Multi-column Layout in PowerPoint
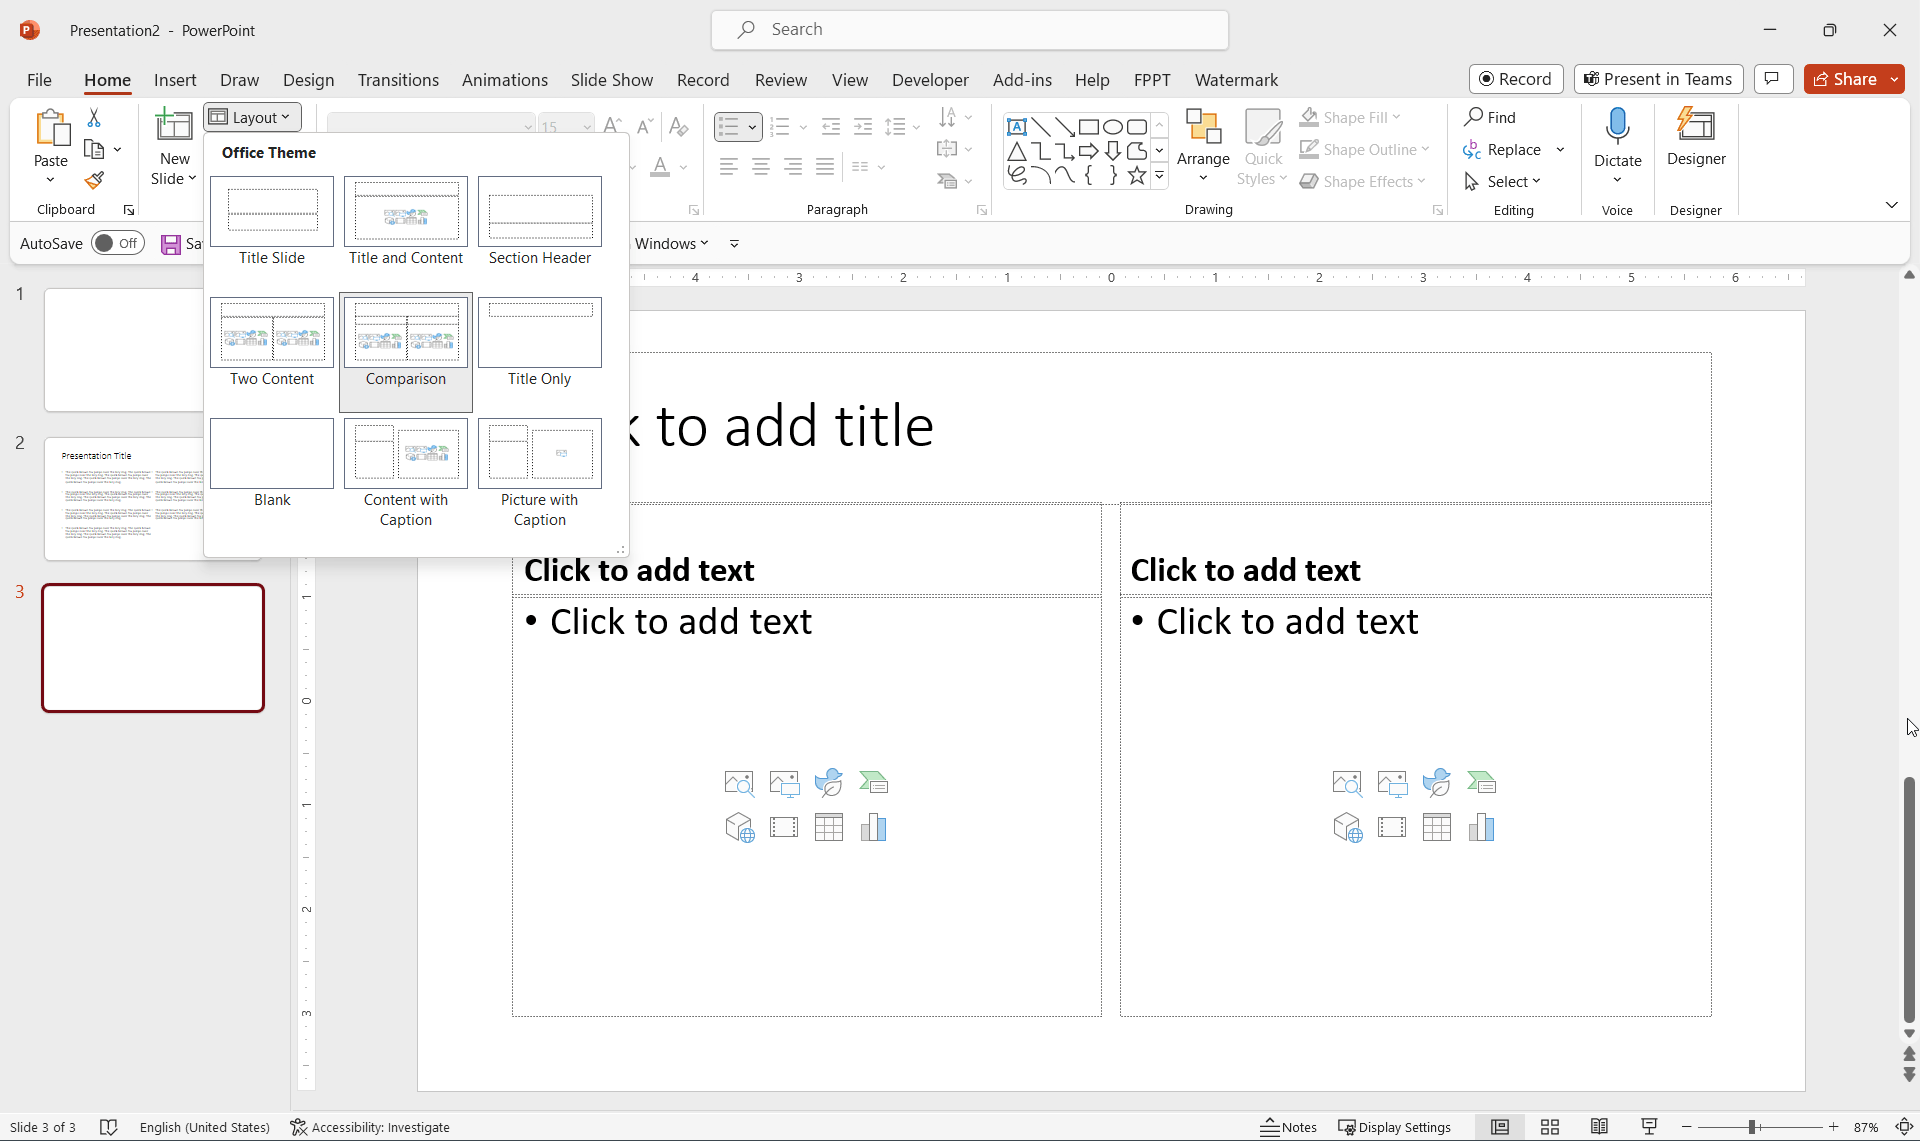
Aside from configuring a different number of columns in a text shape in PowerPoint, you can also rely on the PowerPoint layouts, and choose a layout especially designed for multi-column support.
The default templates provided by PowerPoint already have two column layouts, but if you are using a pre-made template from another provider (e.g. SlideModel or the templates we publish at FPPT), you can simply switch to a different layout.

Benefits of using Columns Feature in PowerPoint
Introducing columns into your PowerPoint presentations can bring a new level of sophistication and readability to your content. Here are some potential uses of the column-inserting feature:
Side-by-Side Comparisons: If you need to compare and contrast two or more items, using columns can help to clearly delineate the different elements being compared. For instance, a product comparison could be easily displayed using separate columns for each product’s features. A CAGE Analysis can also be presented using the two column layouts.
Organizing Thoughts or Ideas: If your slide contains several related but distinct ideas, using columns can help to organize these thoughts in a manner that’s easy for the audience to follow. For example, if you’re outlining the stages of a process, each stage could be detailed in its own column.
Pros & Cons Layout: When you present pros and cons, or benefits & cons, or advantages vs. disadvantages, a 2 columns layout can be helpful. This helps to present the benefits in one side of the slide, while the cons are displayed in the other side. Plus, adding relevant icons and applying colors can help to visually present the ideas in a memorable way.
Displaying Data: Columns can be utilized to emulate simple tables or charts, particularly when the data isn’t complex enough to warrant a full chart or table. This might include simple listings or groups of related facts or statistics.
Creating Newspaper-style Layouts: To evoke the look and feel of a newspaper or magazine article, you could use columns in your textbox. This could be particularly effective in creating a certain mood or style in a presentation, or when the text is lengthy and would benefit from a multicolumn layout for ease of reading.
Balancing Visual Elements: If your slide has heavy visual elements on one side (like an image, chart, or a graphic), you can use columns on the other side to balance the visual weight of the slide. This can help maintain the aesthetic appeal of the slide while ensuring it doesn’t feel ‘weighted’ to one side.
Multilingual Presentations: If your presentation needs to cater to an audience that speaks two languages, you can use columns to present the same information side by side in both languages.
The column-inserting feature in PowerPoint is indeed versatile. It opens up a variety of design possibilities and can significantly enhance the way information is perceived in a presentation. By learning to incorporate it effectively, you can make your slides not only more engaging but also more effective in conveying your message.
Conclusion
Learning how to insert columns into a textbox can elevate your presentations and make your content more engaging. This straightforward task can help you present text in a more organized and visually appealing way.
Remember, the most compelling presentations aren’t just about the information you share, but also how you present it. Adding columns to your textbox can help your audience better understand and engage with your content. With this guide, you’re now equipped with the knowledge to harness the power of columns in your PowerPoint textboxes.
