How to Create Easy Time Dimension Table for Analysis in PowerPivot
When you’re storing large amounts of data, especially time-sensitive ones, it’s important to have a time dimension. This time dimension is important because you can better analyze data and generate relevant reports based on the information you need involving a certain date or time. Having a time dimension table at your disposal, without the need for complicated calculations, can allow you to better access the information that you need and get the reports that you want for better decision-making. Often, creating a time dimension table can be complicated and tedious. For those who are unfamiliar with Excel’s many features, this can be very challenging. Good thing Office has a free add-in that you can use to help you create time dimension table for analysis in PowerPivot.
Use Create Time Dimension Add-in for Excel
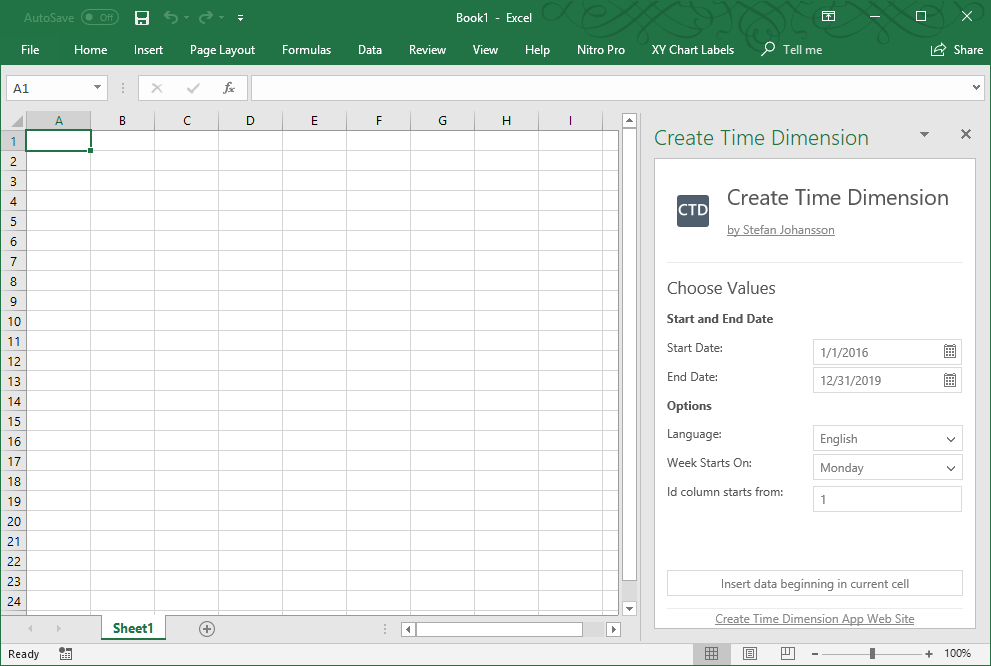
The Create Time Dimension add-in by Stefan Johansson is a very easy-to-use and intuitive add-in that allows you to create day-based time dimension table for analysis in PowerPivot in Excel.
Using your required information for the time dimension, you can create this with the add-in so you can better analyze data in one or more data tables. The plain date information from your source data can also be broken down into more specific dates in months, years, quarters, and more.
By using this add-in for Excel, you take away the hassle and the time-consuming task of manually linking time dimension information every time you need a time-based table in your data. You can easily choose your required start and end dates, the rows representing the number of days can be customized depending on your analysis needs.

Automate Date-Based Tables to Work with Ease
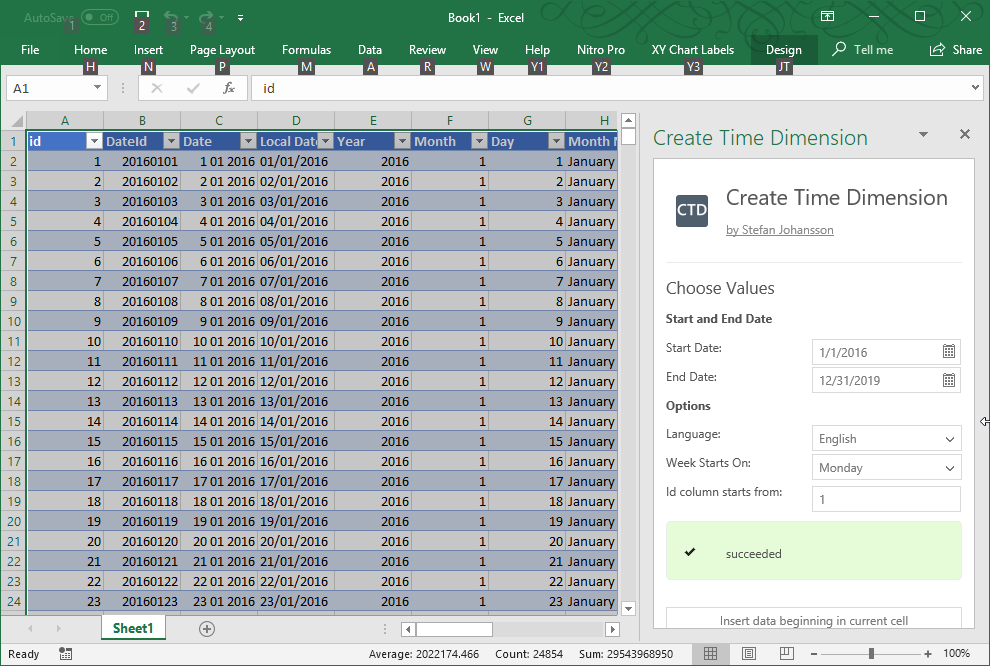
You will have automatically generated columns in your time-based table, which includes Year, Month, Day, Quarter, Day Names, Month Names, Day of Year, Day of Week, and more.
Once you insert the table into the spreadsheet, you can expand and enhance it with any custom column using Excel 2013 formula. You can also add the table to a data model in PowerPivot and extended using DAX.
You can link one of the date columns to the facts date column in the different facts tables in PowerPivot. This allows you to easily do a date-based analysis without much hassle, as compared to doing it all manually, which may require more technical skills than a typical beginner user may have.
You can also create hierarchies in PowerPivot so you can easily visualize data in a Pivot Table in Excel. You can then use the date information for timelines and date-based slicers in Power View.

Create Time Dimension for Excel 2013
This Create Time Dimension add-in for Excel is available only for Excel 2013 and later versions. It can be installed from the Microsoft Office AppSource portal. You can log in using your Office credentials and link your other devices using Excel.

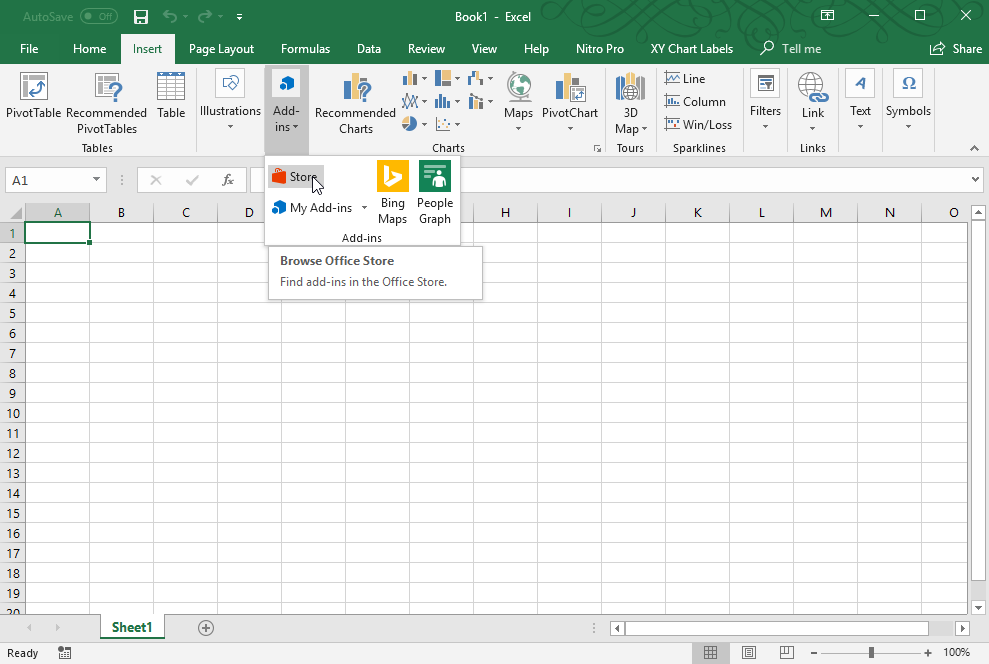
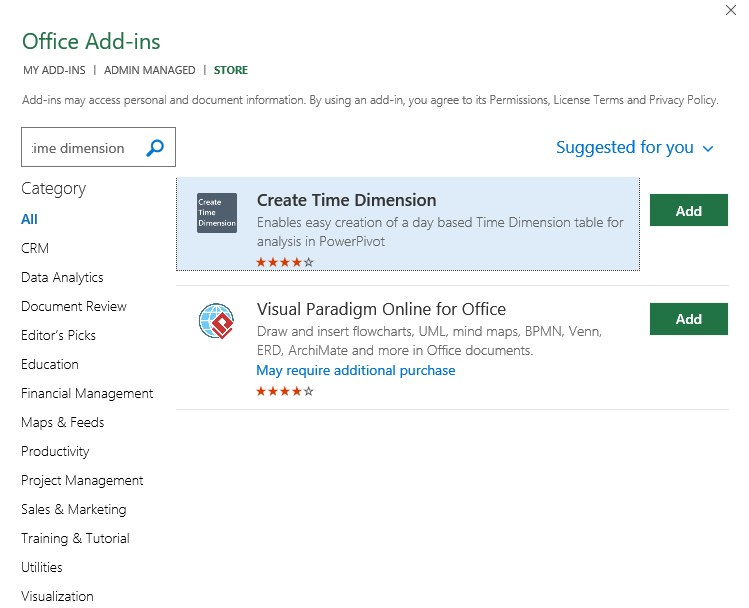
You can also download and install the add-in straight from within Excel 2013. Just go to the Insert tab in the Ribbon, click on Add-ins>Store and then you can just go over the categories or type the add-in name in the search bar, in this case, Create Time Dimension. Then, once you see the add-in, just add it and follow the instructions to download and activate in Excel.

What’s great about Office add-ins such as this is that you can just install it in the corresponding Office program and if your devices are linked with one Office log-in, you can work using the add-ins seamlessly. You don’t have to keep installing every add-in in each Office program, making your work so much more productive and cutting your time in half. You also enjoy extended features to your Office programs so you work better, faster, and smarter.
