How to Convert SmartArt to Text in PowerPoint
PowerPoint 2016 has many new amazing features, and one of those is converting existing bulleted lists into SmartArt graphics. This is very convenient if you want to create powerful visuals. It also helps you avoid chunky blocks of text that are definitely big no-nos in slides. However, what if you need to do something the other way around? What if you need to convert SmartArt to text in PowerPoint? Read this tutorial to find out how to convert SmartArt to text in PowerPoint.
Converting SmartArt to Text in PowerPoint
In earlier versions, it’s was not possible to convert SmartArt back to a bulleted list. It’s not until PowerPoint 2016 when Office rolled out new features that you’re able to do this.
So, if you want to do this, the first thing you need to do is to first create a duplicate of the slide with the SmartArt graphic, just for backup. In the Slides Pane on your left-hand side of the window, or in the Slide Sorter View, just press CTRL+D on your keyboard as a shortcut to create the duplicate. Then, you can start converting by going to the original slide.
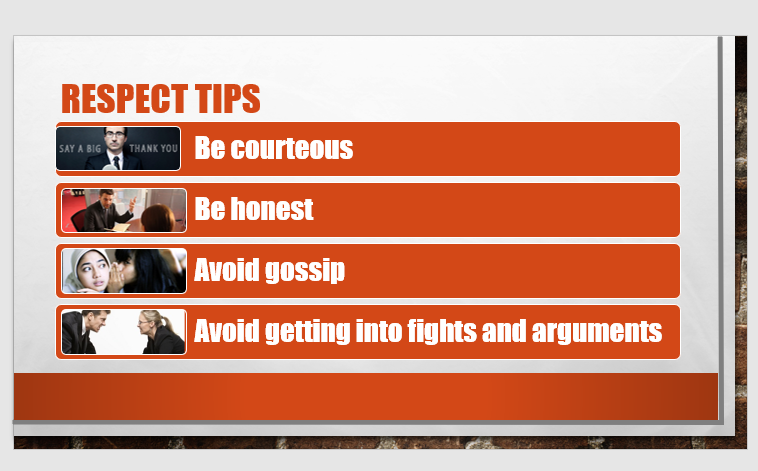
Select the SmartArt graphic you want to convert. In this example, we have the Vertical Picture List.

Use PowerPoint’s New Feature to Convert SmartArt to Text
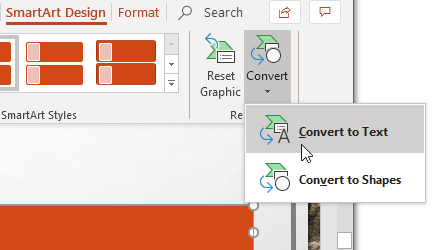
Once you’ve selected the SmartArt graphic, you will see dotted lines around the graphic. You’ll also find two contextual tabs on the Ribbon, the SmartArt Tools Design and the SmartArt Tools Format. Click on the SmartArt Tools Design tab.

Then, under the SmartArt Tools tab, click the Convert button to populate the drop-down list. Then, under this list, select the “Convert to Text” option. This function will automatically convert the SmartArt graphic to bulleted text.

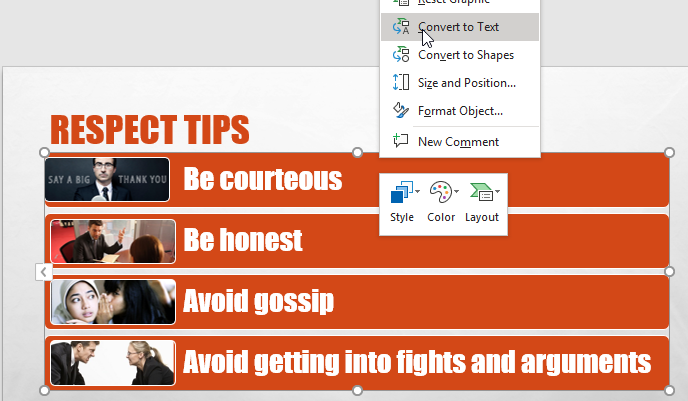
Another way is to right-click on the SmartArt graphic to go to the resultant context menu on the tabs. Then, following the same instructions, select the Convert to Text option under the SmartArt Tools tab

