How to Change the Size of a Bullet in PowerPoint
Last updated on September 3rd, 2024
You can format the size of bullet points if there are too small or big for the presentation. In this article we will show you how to change the bullet icon size in a bulleted list. The adjustment of bullets can be also applied to numbered lists in the same way. In this article you will learn to change the size of a bullet in PowerPoint.
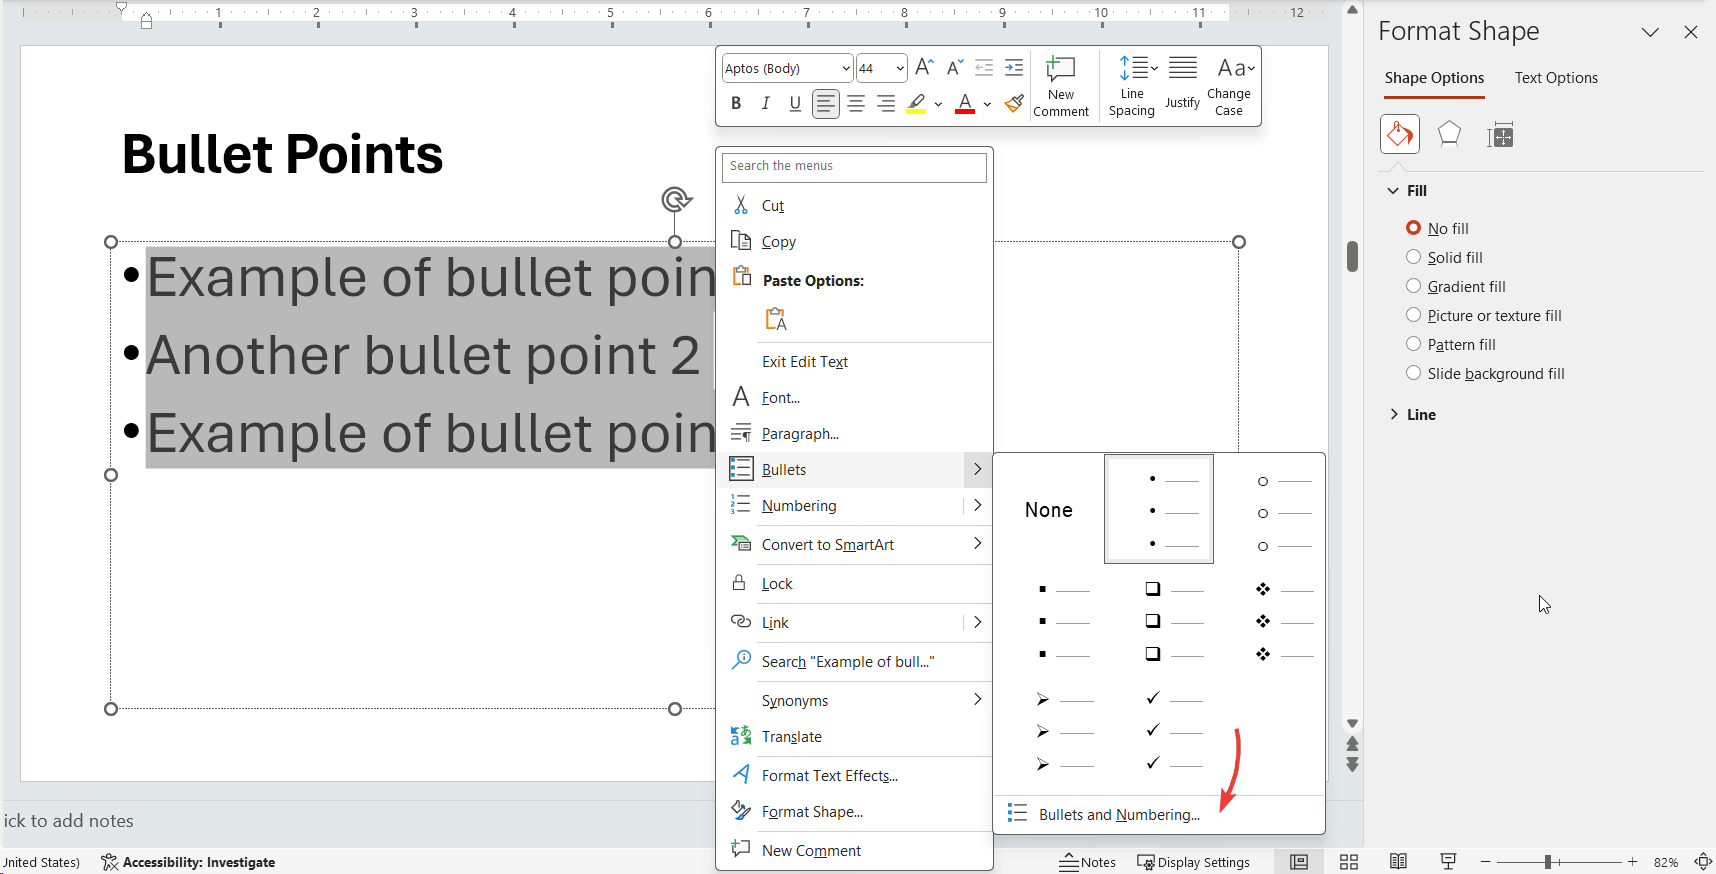
Go to the slide where you have the bullet list and then select the text. You need to open the Bullets and Numbering dialog box and then change the size textbox.

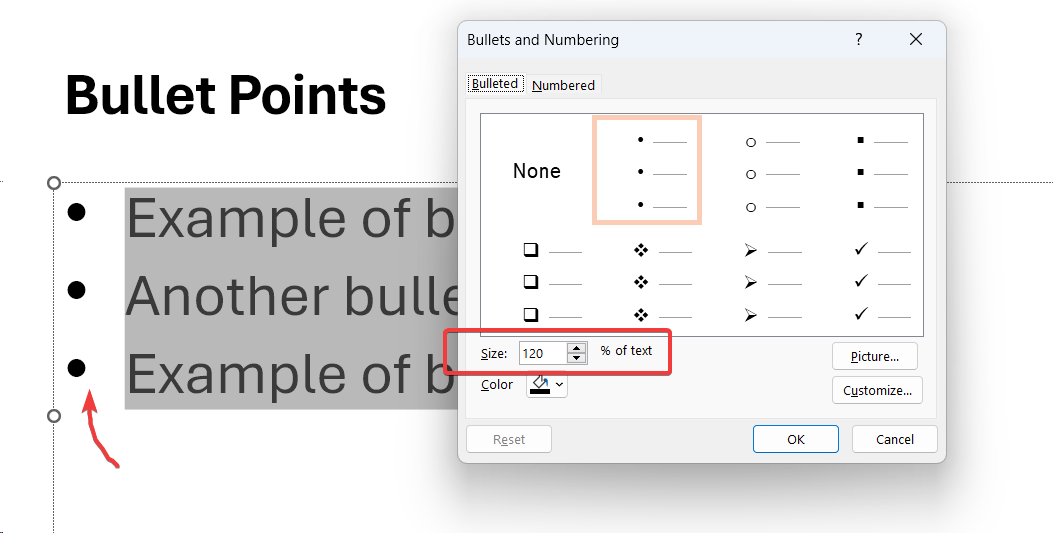
Here you can see that there is a textbox for size. Try increasing the font size by 120% or 150% of the text size. Then click OK to show the changes on the screen. You can also change the color of bullet points and the bullet icon. If you wish, you can replace the default bullet points by a Picture or customize the bullet list.
How to Increase Bullet Size in PowerPoint without Misaligning Text
If you follow the steps above, you will notice that sometimes by changing the bullet point size in PowerPoint, the text is lower than the bullet point and not centred on the bullet.
Fortunately, there is a workaround for this problem. Let’s see how to change the bullet point size like a Pro.

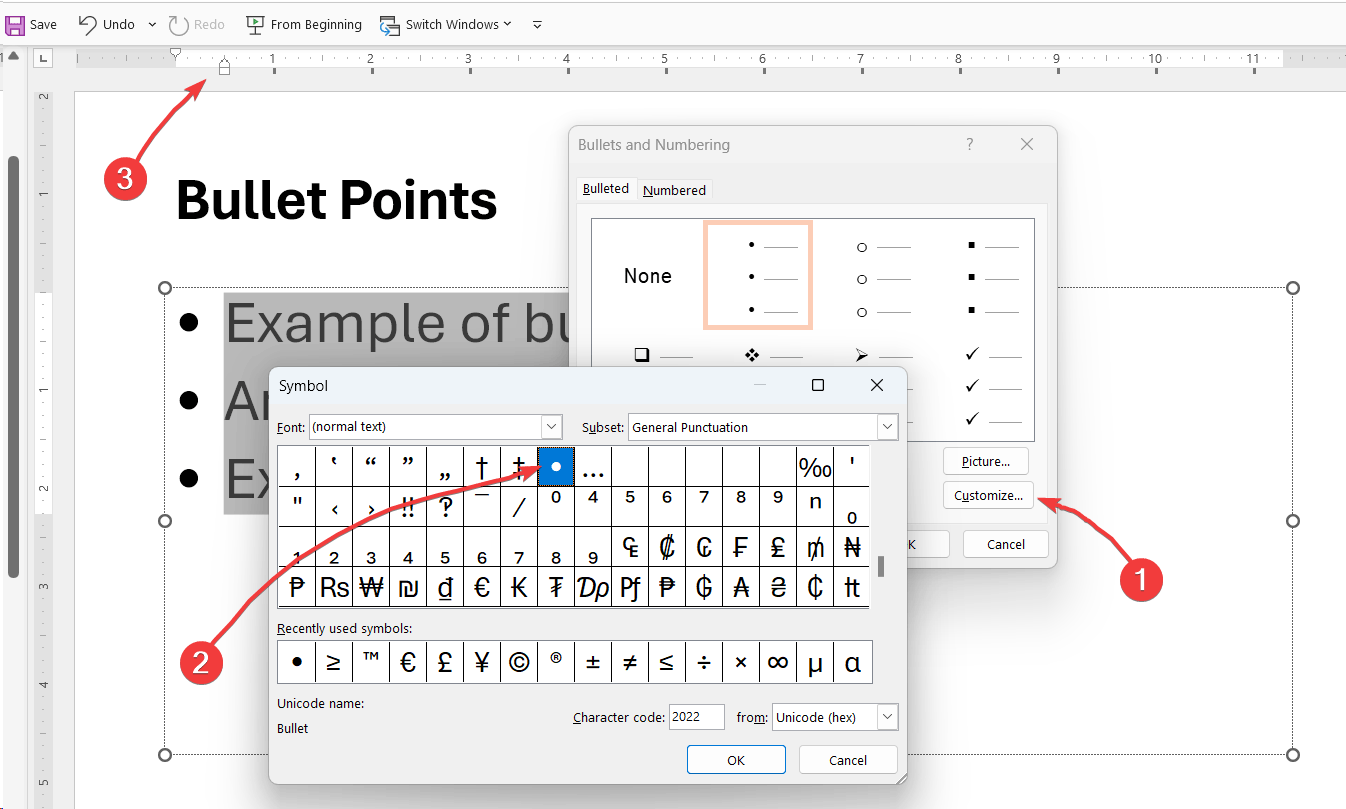
The trick here is to choose a larger bullet. Bullet comes in different sizes, so you if you use a round bullet point icon or design, the default one might be the tiny one. Customize the Bullet and then choose a larger bullet point. Then, that will force the distance from the baseline to increase, giving the effect you posted.

The steps to follow are:
- Right click over the bullet list, select Bullets and Numbering and then Customize.
- Choose a larger bullet point and accept
- Then, adjust the indent of text to separate the text from the bullet list a bit from the bullet point.
By following these steps, you can control how the bullet points are displayed. This works for bulleted lists using custom icons or pictures, as well as numbered lists.
