How to Animate SmartArt Graphics in PowerPoint Presentations
Last updated on April 1st, 2024
You can use SmartArt to create diagrams in PowerPoint very easy. This includes all kind of diagrams, from workflow diagrams, process diagrams, timelines, roadmaps to comparison slides, tables or advanced graphics with pictures. SmartArt is a good alternative to start graphics from scratch using shapes, because it provides an built-in inline editor that will let you add many items at once.
By using SmartArt graphics, you can create visually appealing slides in PowerPoint that engage, and use them as an alternative to traditional bullet lists. Futhermore, adding subtle animations to your SmartArt diagrams let you present your ideas and concepts in a visually appealing way instead of the boring static slides.
In this article, we will show you how easy it is to add a custom animation to a Smart Art graphic in PowerPoint, so you can animate each part of the diagram or PowerPoint graphic to make it more attractive for the end user and engage the audience.
How to Animate SmartArt Graphics using PowerPoint
To get started, let’s use the free SmartArt template with block lists.
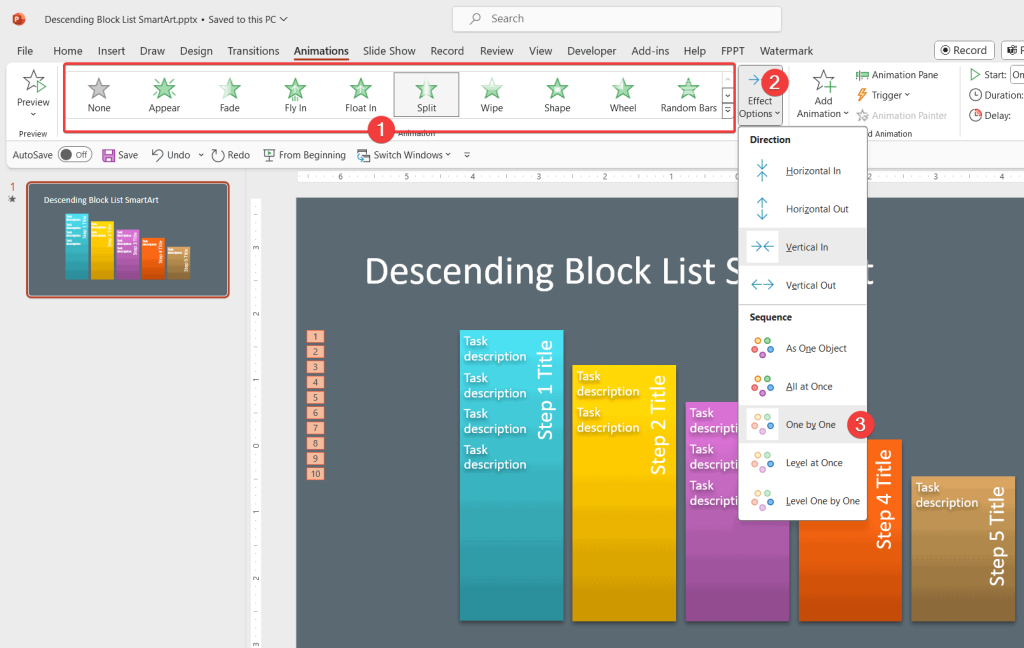
Once you download it and open it in PowerPoint, go to Animations tab in the PowerPoint Ribbon.
Select the block list SmartArt graphic and then insert an animation. You can for example use the Split animation or any other animation that you want.

Then, press Effect Options button and then click onthe One by One so the animation is applied to every object inside the SmartArt graphic.
To see the live animation, press Shift-F5 key or preview the slideshow from the begginning. You can also configure the animation by changing the timing and effect if you want. Here you can see a live example using the split animation.

The above image shows an animated SmartArt graphic in PowerPoint.
