How to Align the Bullet Points in PowerPoint
Misaligned bullet points can detract from the visual appeal and professionalism of your PowerPoint slides. In this article, we delve into a step-by-step guide on how to align bullet points in PowerPoint, ensuring your presentations are both visually appealing and effectively communicative.
Sometimes when you add bullet points in PowerPoint the paragraphs are not well aligned and this can be really annoying for the PPT reader. Here we will show you how to align the bullet points in PowerPoint.
Adjusting the Bullet Indentation in PowerPoint
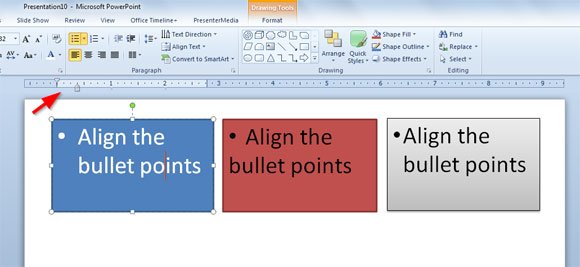
First, you need to access to the paragraph properties for the text used in bullet points, but if you have the ruler enabled, then just move the markers on top. This is similar to Word to control the margin options.
Still within the Paragraph group, locate the Increase List Level and “Decrease List Level options, often represented by arrows. Click on Increase List Level to indent the bullet point to the right, creating a sub-point. Conversely, click on Decrease List Level to outdent the bullet point to the left.

To display the ruler, go to View menu and then click on Ruler checkbox. There are two markers available to control, the top one and the bottom one.

To ensure consistency across multiple slides, you can use the Format Painter.
Conclusions
Aligning bullet points in PowerPoint is pivotal in crafting a polished and professional presentation. By following this step-by-step guide, you ensure that your key points are presented clearly, cohesively, and aesthetically, thereby enhancing the communicative efficacy of your slides. Explore more tips, presentation templates, and PowerPoint resources at FPPT.com to elevate your presentation game to the next level.
