How to Add Text to a Live PowerPoint Presentation
Last updated on November 13th, 2024
We all know that presentations are widely used for all kinds of settings: at work, in school, in communities, and everywhere else. From boardrooms to classrooms, presentations can have all types of audiences. However, the success of your presentation depends on how dynamic your presentation is and how interactive you are with your audience. Slideshows can be static. Once you’ve created it and you start to present, there is no way to add to it other than to talk over your slides. However, that changes once you know this trick about how to add text to a live PowerPoint presentation.

Make Your Presentations More Dynamic for Your Audience
Adding a text to a live PowerPoint presentation can make you more in touch with your deck and with your audience. It makes the presentation more interactive and dynamic. The ability to add text to live presentations like this also makes it seem that you are really talking to your audience and that it’s not one-sided. The text you add to the slides can be suggestions, ideas, or answers from your audience.
This is a great feature to PowerPoint because instead of just talking or declaring their ideas for the rest of the audience, or to scribble down notes on a piece of paper while you’re on stage, you can actually just write on your deck for everyone to see. By adding text to your live presentation, you also don’t have to stop the slideshow to edit the slide, which can, therefore, disrupt the show.

How to Add Text to a Slide in Live Mode
If you’ve been using PowerPoint for a while, then you know adding text to slides is easy. However, it can be quite tricky when you do this in presentation mode. You can’t just add text on the fly, although it may seem like it is, you really have to set it up first before you present.
Related article: Learn how to add text to PowerPoint slides
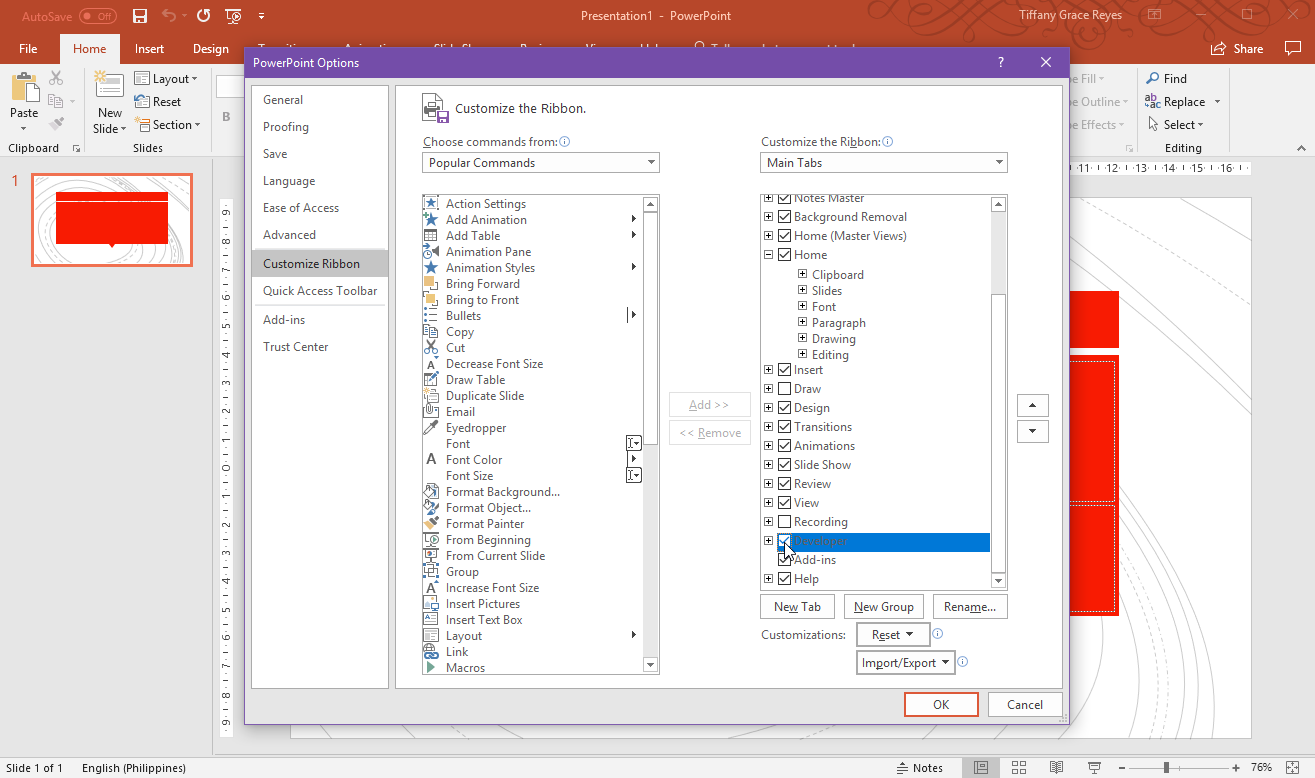
First, open your presentation in PowerPoint, then go to File. Under this, click on Options. On the Options window, click on the Customize Ribbon tab. Here, you can enable the Developer tab so it shows on the Ribbon. Then, click OK.
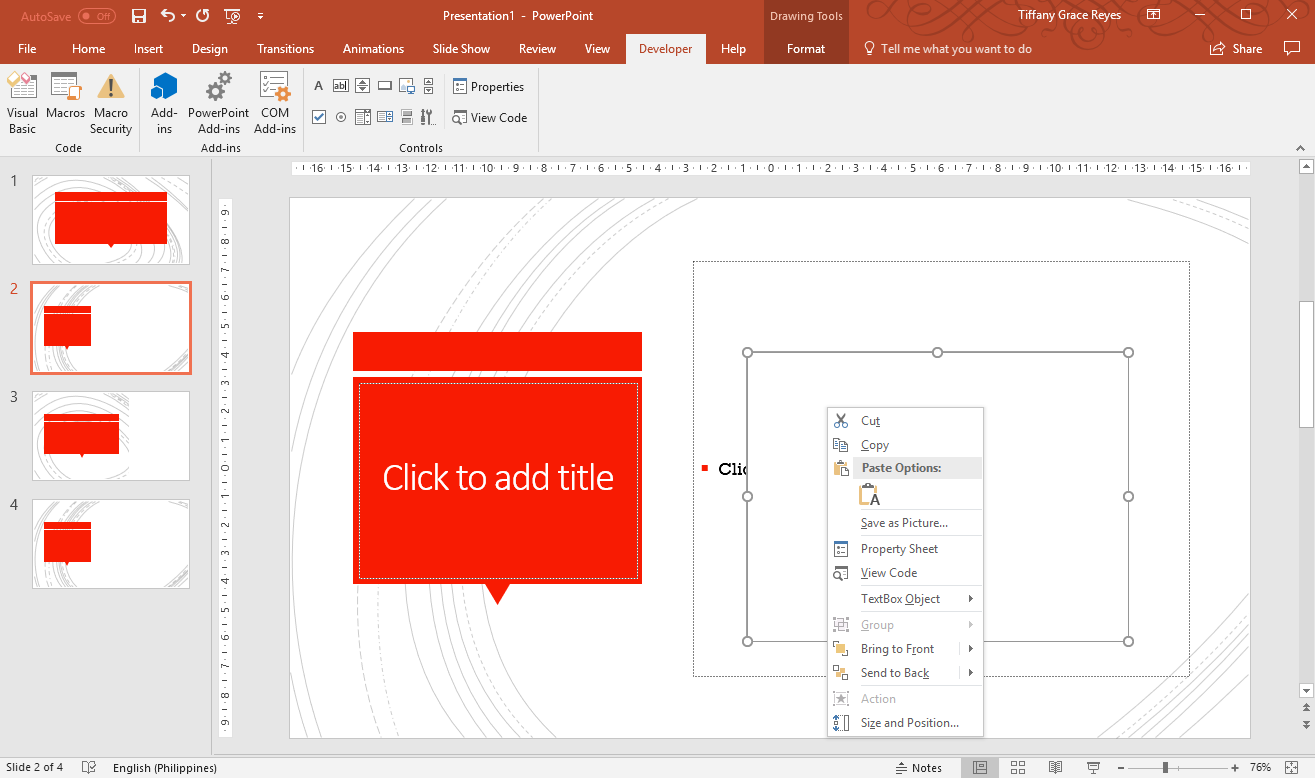
Now, you can return to your presentation and click on the Developer tab. Under this tab, click on the text box button under Controls. Then, draw out a text box on your slide, taking care not to obstruct any text, media or any other object in your slides. Afterwards, right-click on the text box and select Property Sheet from the context menu. This will populate the Properties window.

Set Up Text Boxes to Your Slides Before Going on Live Mode
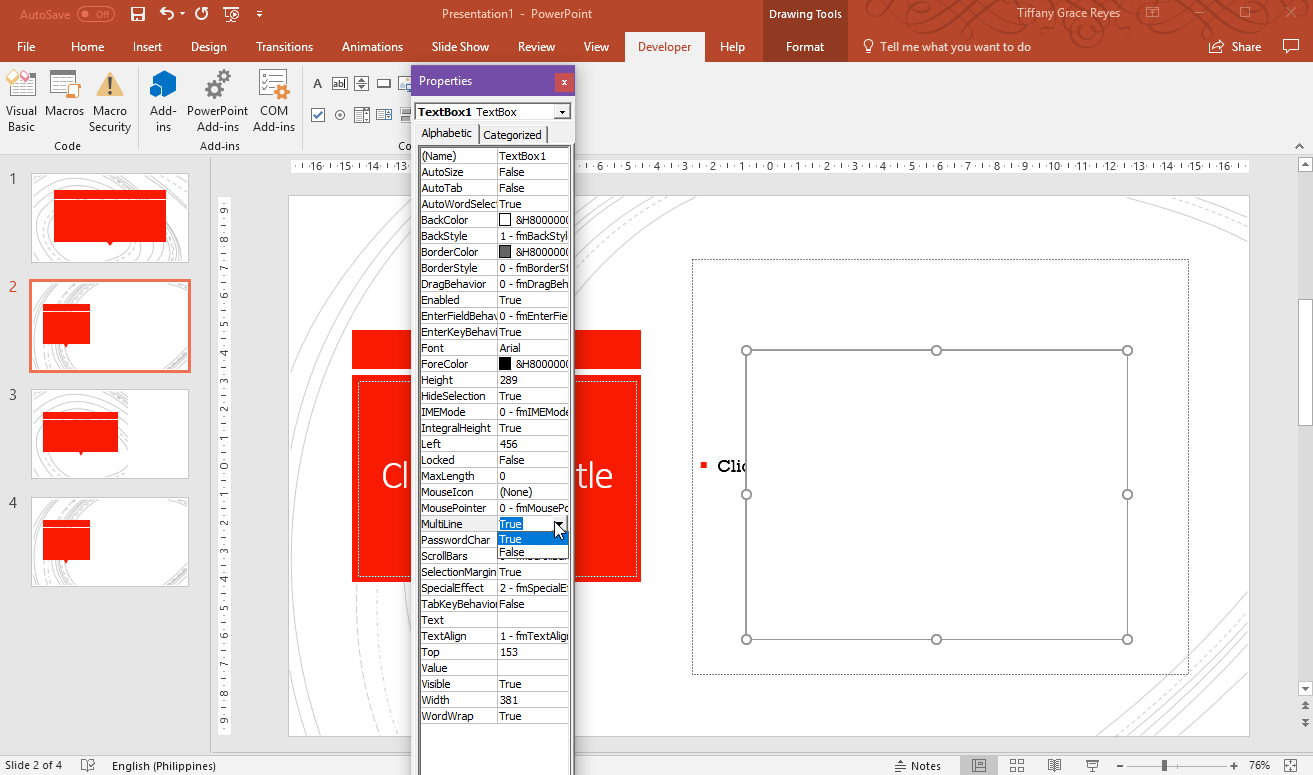
Once you’re in the Properties window, look for two properties within the alphabetized list: EnterKeyBehaviour and MultiLine. Set both to True from the drop-down next to each of them.
Once all these are set, you will be able to enter text into any of the text boxes you have earlier set up. Therefore, when you start to go live with your presentation, your audience will not see the text box on each of the slides, only those you add text to.
A pro tip is to add these kinds of text boxes when you have an interactive slide, like when you need to ask a question to your audience or conduct a poll. For this purpose, you can also reuse one of our free PowerPoint templates prepared for survey or poll results. Once you enable your Developer tab, you don’t have to enable it each time, and therefore, you can be able to do this trick each time you create presentations.
