How to Add Drop Shadow in PowerPoint
Last updated on November 23rd, 2024
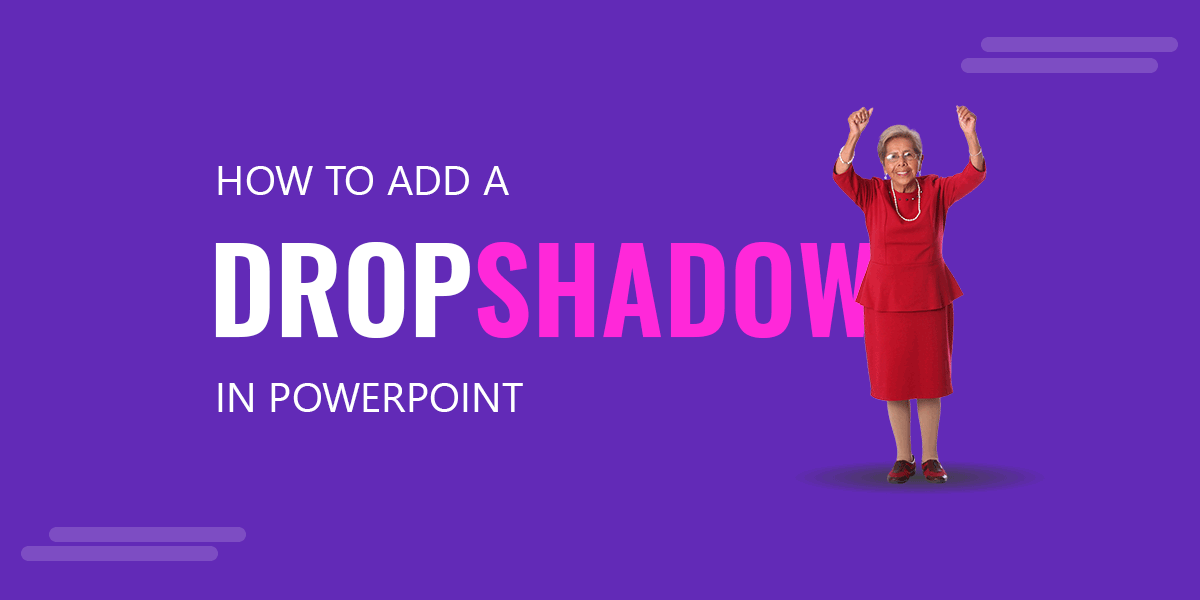
Creating a Drop Shadow can help to highlight and emphasize certain objects and shapes in PowerPoint. You can use a drop shadow as a technique to add a shadow to objects. In this article, we will explore a simple way to add drop shadows in PowerPoint.
The approach that we will follow keeps out from using images. We will keep away from using images to create the drop shadows, and instead, we will use PowerPoint shapes and apply some special fill options to produce the drop shadow effect. This will help to add a lot of flexibility, for example, if we need to resize without losing the quality, or change the drop shadow color. We can use this technique to improve our presentation design or apply it to our free slide templates. Let’s see how to apply a drop shadow in PowerPoint to the cutout of Susie.
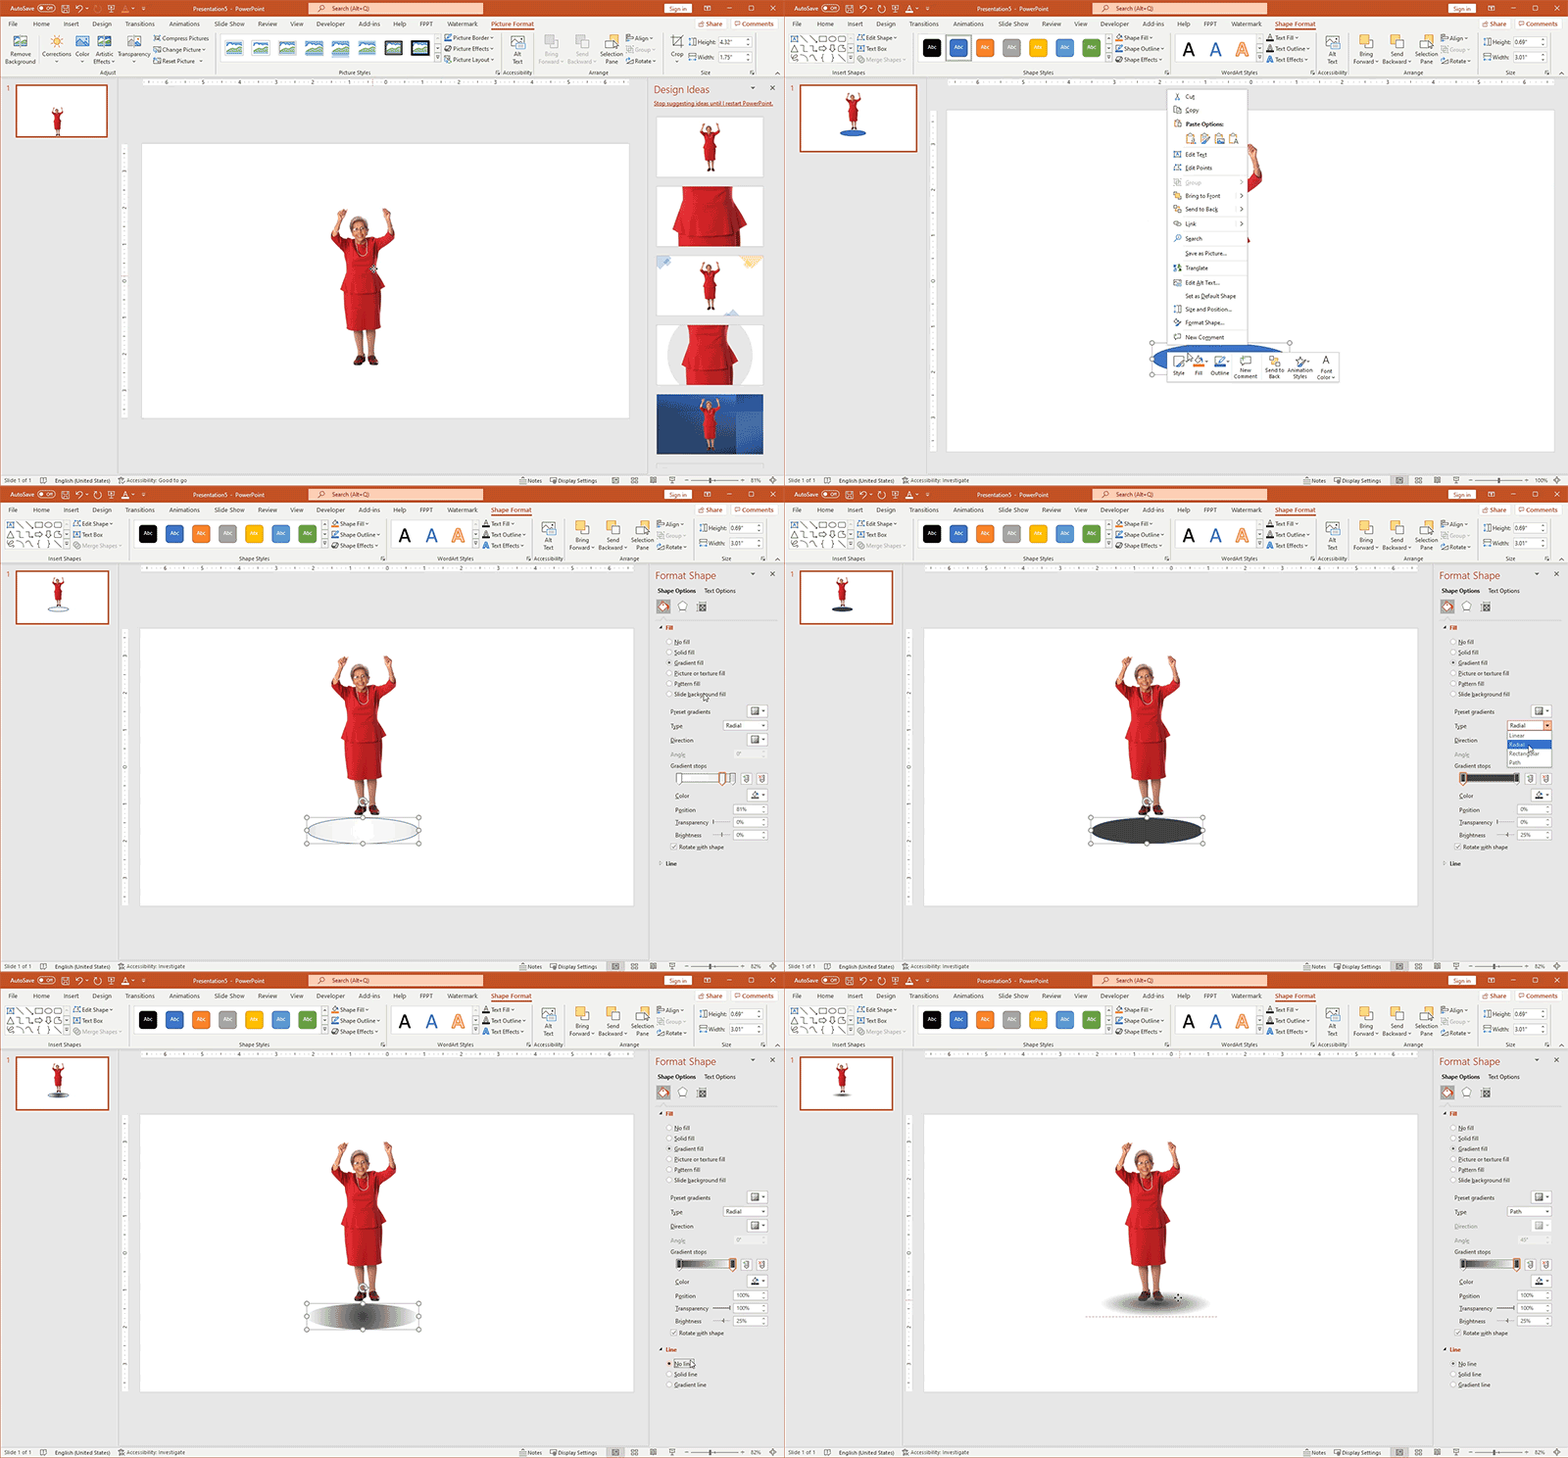
Adding a Drop Shadow in PowerPoint – Step by Step
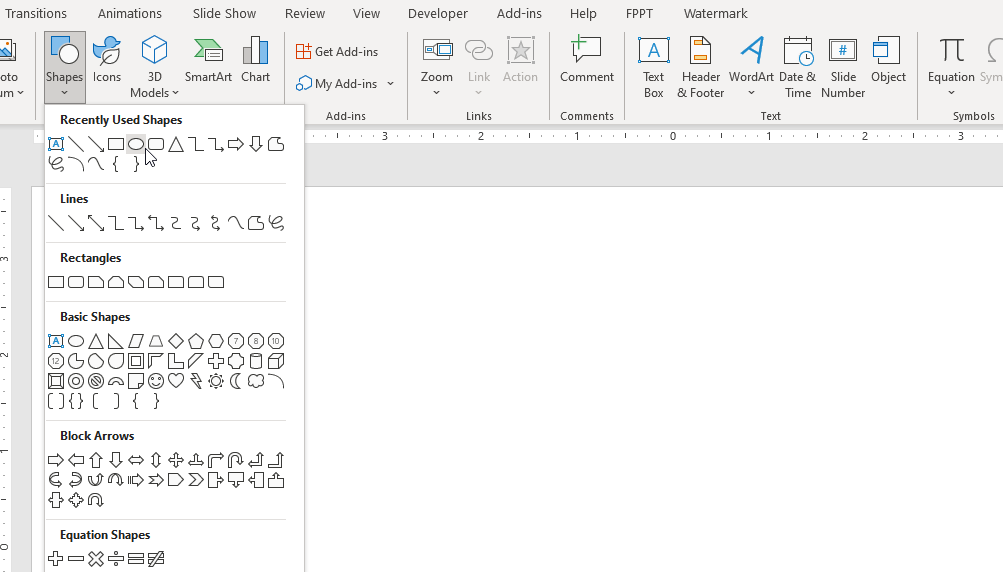
Step 1 – Add an Oval Shape
The first step is to add an oval shape. For this purpose, you can insert a shape in PowerPoint using the Insert -> Shapes option.
Step 2 – Use Gradient Fill as a Fill option
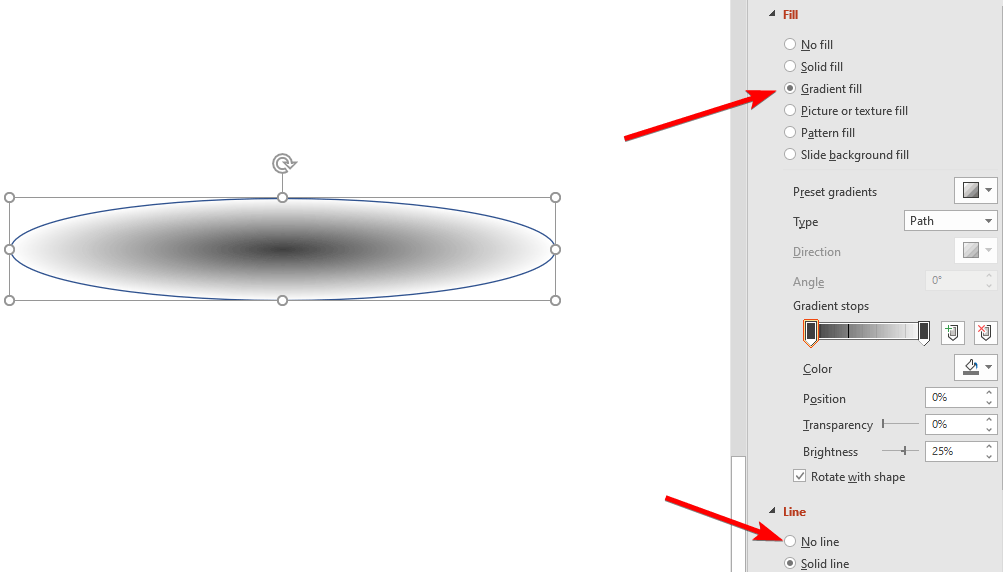
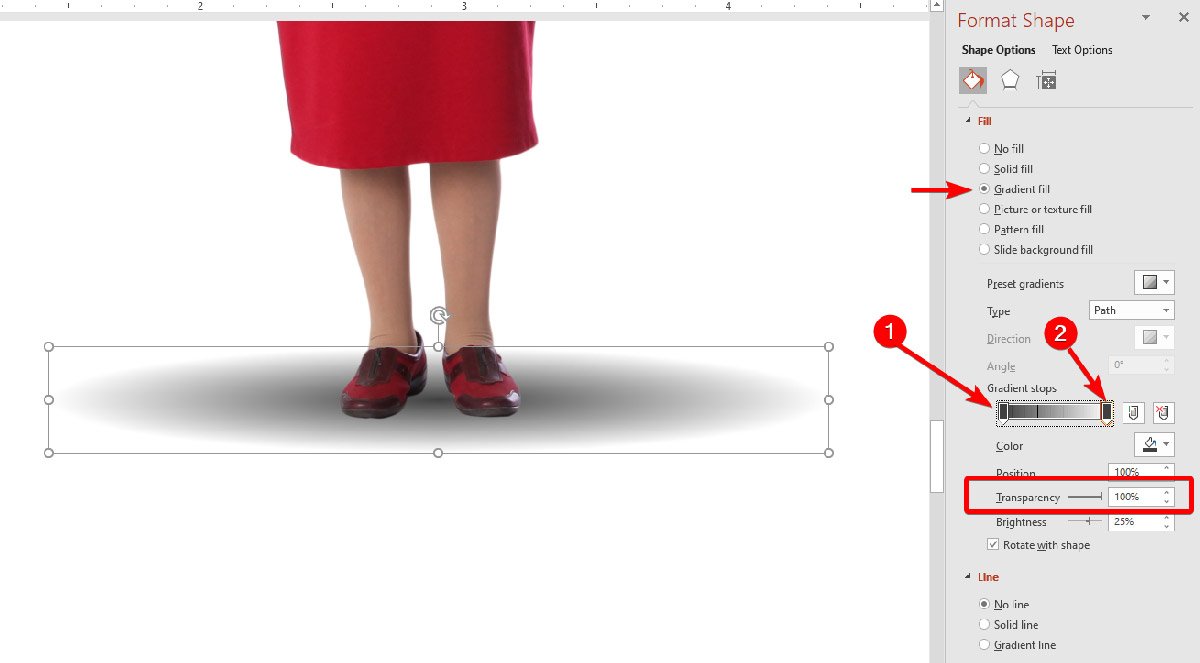
Next, configure the Fill options for the oval shape that was added. By default, PowerPoint will add a border to the shape, but you can easily change this by configuring No Line. Also, change the Fill option to Gradient fill so we can produce the drop shadow effect.
Step 3 – Configure Gradient Type, Gradient Stops and Transparency
The next step is to configure the gradient stops. We recommend having only 2 steps and configuring one of the stops with Full Transparency (transparency level 100%).
Make sure the gradient type is configured as “Path”, this is what will add the drop shadow effect to the shape.
In summary, here are the changes that you need to apply on this step:
- Make sure Gradient Fill is selected for the Oval shape
- Configure Gradient type to Path
- Configure 2 Gradient Stops
- Set one of the gradient stops to use 100% transparency level
You can add a drop shadow with an oval shape, or alternatively use a different shape. Let’s say, for example, we want to add a drop shadow rectangle.
Adding Drop Shadow to shapes, images or text
What’s next? Now you can focus in finishing your slide design. You can use this drop shadow technique in PowerPoint (and also in Google Slides) to decorate your graphics, images and text. For example, imagine that you are working in designing a creative Thank you slide for your presentation (as shown in the Thank you slide below), you can apply a subtle drop shadow effect below the Thank you words.

This way, you can create amazing slides in PowerPoint with excellent drop shadow effects. As you can see, we haven’t used the built-in shadow features in PowerPoint but instead, we re-created the drop shadow using gradients, transparency level and fill options. You can also use the same approach to add a drop shadow to a rectangular shape.
If you are wondering which shadow properties can you adjust in PowerPoint and Google Slides, subscribe to our website and learn more. Now that we know how to insert a drop shadow in PowerPoint, Susie is happy.
