Easy Guide on How to Insert a Calendar in your PowerPoint Slides
In our student and professional life, we all experienced having to create a calendar and present it. Depending on where you are in your productivity life, knowing how to make an interactive calendar in your PowerPoint slides is pretty useful, and it is inevitable.
Whether you are a student, an employee, or a mom, it is a universal process to create a calendar for planning activities, preparing for small or big projects, or scheduling household chores.
Calendar creation should be easy, especially with all the different platforms, applications, and tools available. There are a lot of means online and offline for creating a calendar. One of the famous and widely used tools is Microsoft Excel. People choose to add a calendar to Excel because it is familiar and the spreadsheet style makes it easier to assign dates to each specific cell. Some opt to download a calendar template online and others manually create their own calendar in PowerPoint, Canva or Adobe Illustrator. Undeniably, most of us had done this in the past, or we have been doing this that made us hate creating calendars. It is not the most enjoyable thing to do, but we cannot shy away from planning and scheduling.
Another option out there that is similar to Microsoft Excel is Google Sheets. It has the same features and functionality as Microsoft Excel, so people would also simply insert calendars in their PowerPoint slides produced from Excel or Google Sheets.
Why integrate calendars and collaborate during presentations?
But what happens next once the calendar creation is done ? Is it really done or is it a never-ending process of revisions and changes?
More often than not, calendars are for collaboration. Hence, we need to share, delegate, and present them. The struggle begins when we need to incorporate the calendar into our presentations when collaborating or brainstorming ideas with your peers, colleagues, and even loved ones. It is tedious to go back to your Excel or Google Sheets and edit your source calendar and then copying and pasting it back on your PowerPoint slides.
Why do all these unnecessary steps if you can directly create a calednar for free, and manipulate the calendar on your slides? This article will explore a creative way of creating calendars for any presentation (for free). All you need is an interactive calendar maker tool, not a screenshot from your Excel calendar. Fortunately, you can use the CalendarSlide App, a calendar maker tool that helps you produce an interactive calendar that you can still edit the text or numbers, even during your presentation. You don’t need to sprint back to your source calendar and revise everything.
What are the Benefits of using CalendarSlide?
- No sign-in or registration is needed before you can access the calendar maker.
- User interface is intuitive, easy to use, and faster navigation, as the functions and features, are straightforward and not complex.
- Faster way of designing your calendar based on your preferences. Create monthly calendars, yearly calendars, or calendar planners on the fly without hassle.
- Besides its efficiency, it does not ask for a payment fee or subscription fee before you can use the tool.
Method #1: Inserting a Calendar into PowerPoint Slides using CalendarSlide
Here’s a quick and easy guide to inserting your calendar into your PowerPoint slides using CalendarSlide tool.
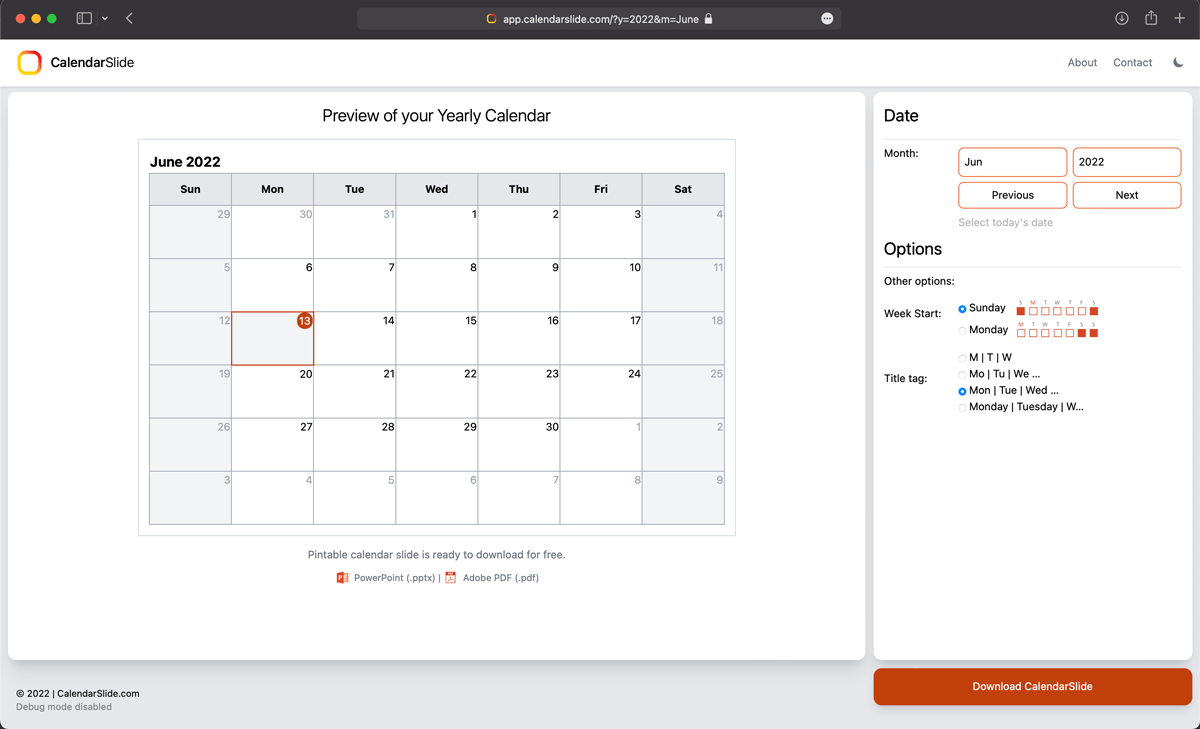
- Go to CalendarSlide.com. This website is a gem that you don’t need to sign in to access this calendar maker for PowerPoint.
- Edit the date of your choice. You have two options for this one:
- You may select the Month and Year on the first two boxes.
- Or click the “Previous” or “Next” buttons as this will automatically produce the previous month or next month. You may also click the “Select today’s date” button to revert to today’s date.

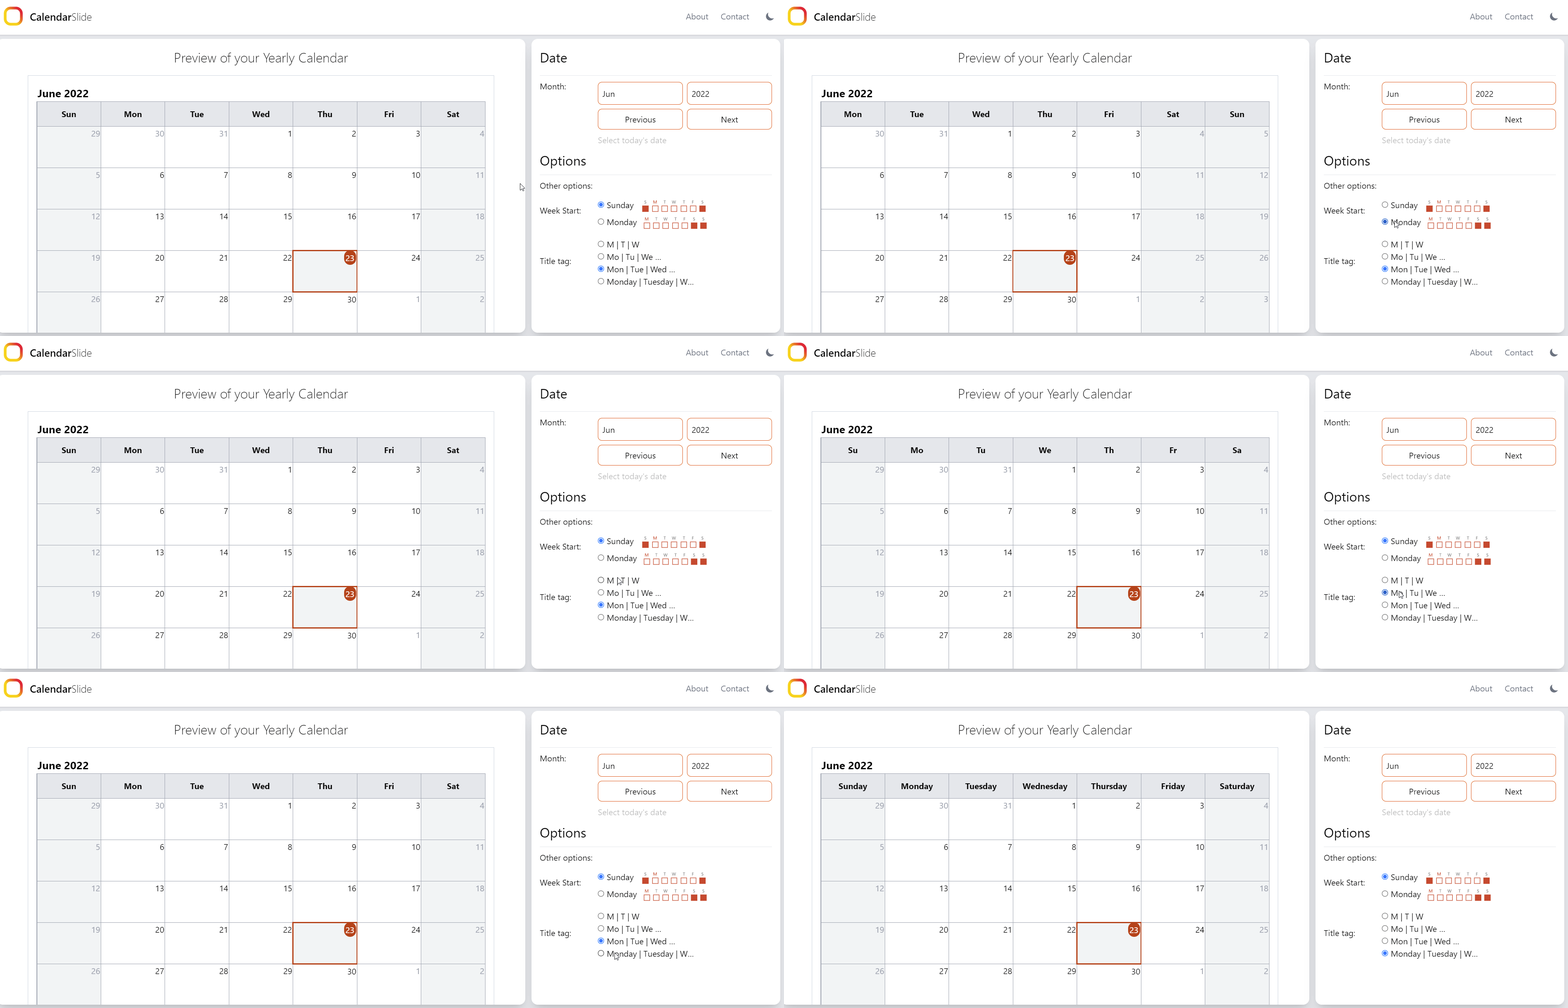
- Modify the Options based on your preferences. Select one between Sunday and Monday as the first day of the week. Next, select the format of the title tag of your calendar.
- Download Calendar Slide button. Once you are done and happy with your calendar, you can now download it by clicking the Download Calendar Slide button.
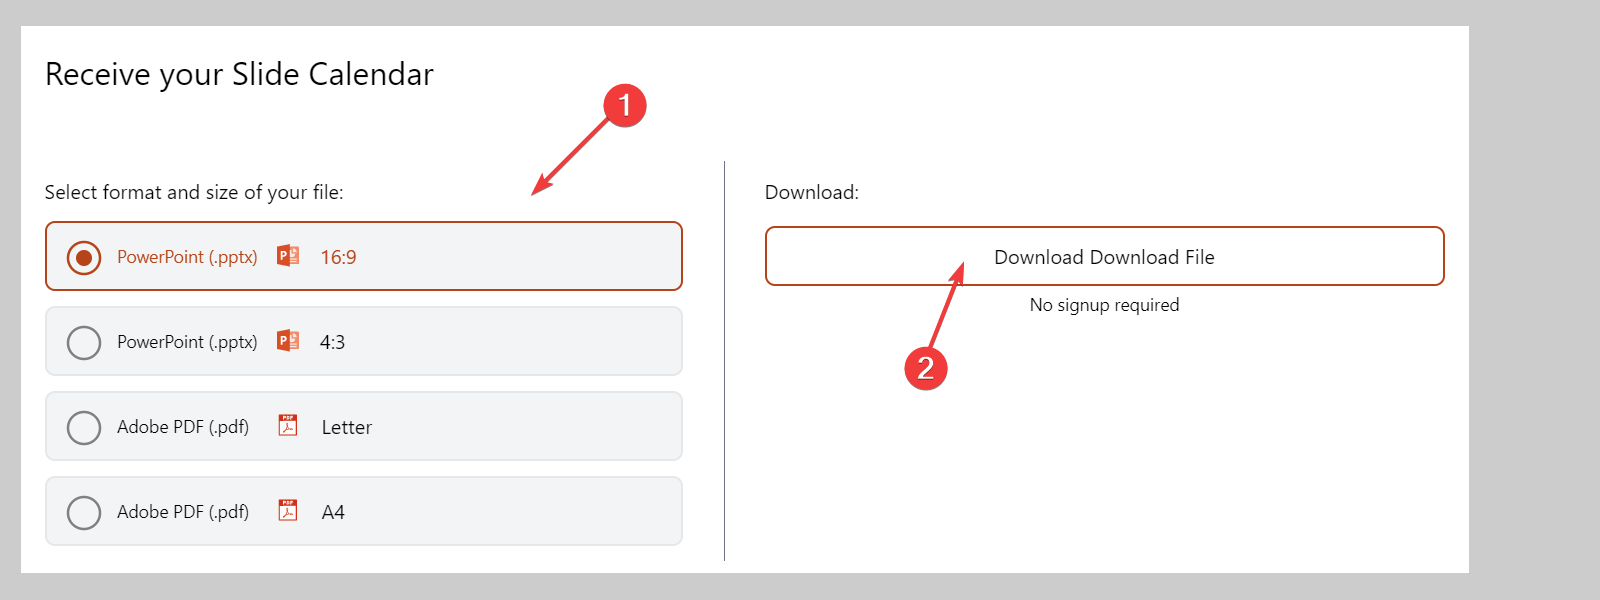
- Receive your CalendarSlide. Select the format and size of your calendar. You have four options for this:
- Download in PowerPoint format and on widescreen by selecting the first option that says PowerPoint, 16:9.
- Download in PowerPoint format and on standard screen by selecting the second option that says PowerPoint, 4:3.
- Download in PDF format and on letter size by clicking the third option that says Adobe PDF, letter.
- Download in PDF format and on A4 paper size by clicking the third option that says Adobe PDF, A4.
- Once the download is complete, you will see the file you edited on your local computer in the Downloads folder. In the case of a .pptx file, you can open this presentation in PowerPoint and continue editing it.
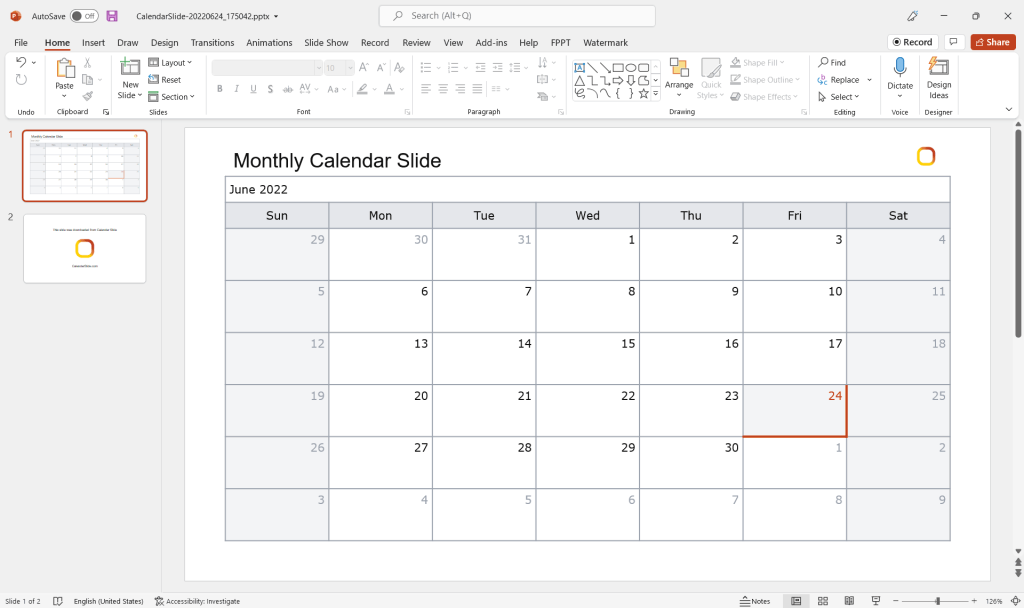
- Customize your downloaded file by changing the font style, color, and text. Add images as background or icons on your calendar.
- Do not forget to save your work by clicking the Save button as you would normally do when working on PowerPoint.
We must value our time and efforts by eliminating unnecessary steps and drawing a calendar from scratch is one of them. Also, having too many options online can feel like an endless loop of exploring and experimenting. This simply means not getting things done.
Method #2: Creating a Custom Calendar in Excel using a pre-designed Calendar Template
Another approach to generate a calendar on the fly is using Microsoft Excel.
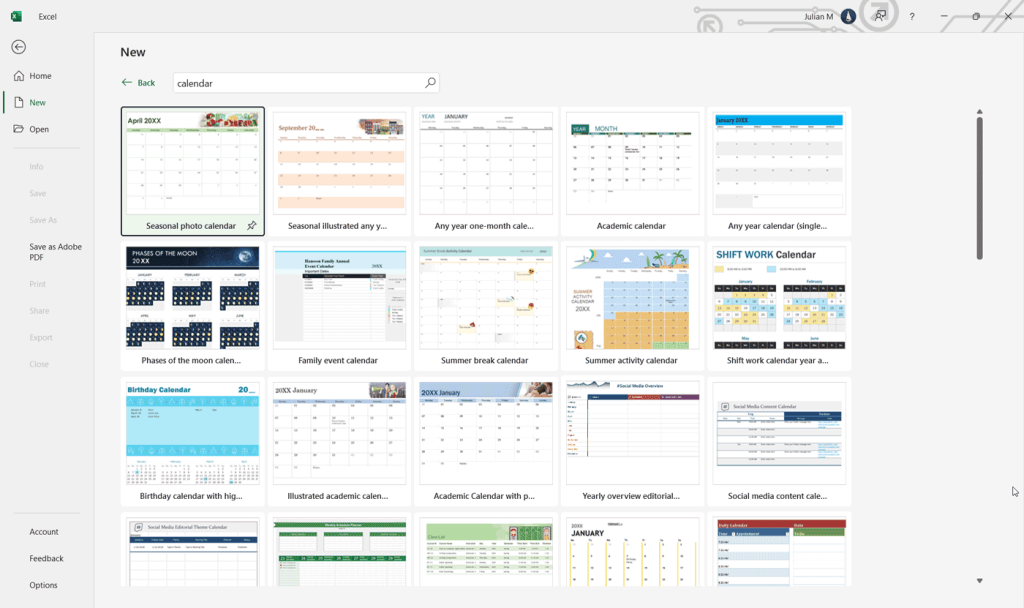
To add a Calendar in Excel, you can go to File -> New and then enter Calendar in the search box.
Excel will show search results with a collection of calendars for a variety of purposes. Here, you can pick to use any calendar template available in Excel, ranging from Academic calendar to Business calendars, but also different calendar types, like Monthly calendars, Yearly calendars or even Day Calendars.
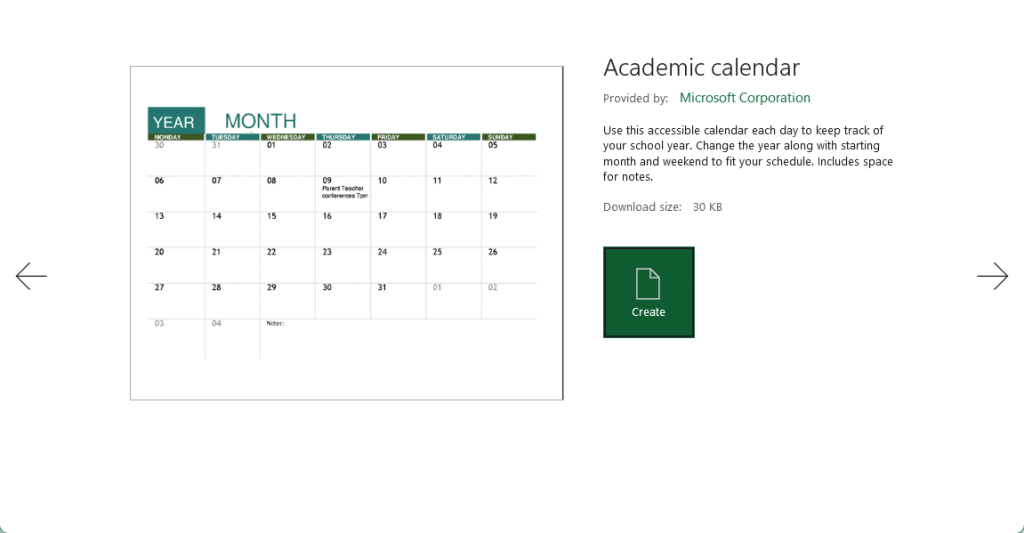
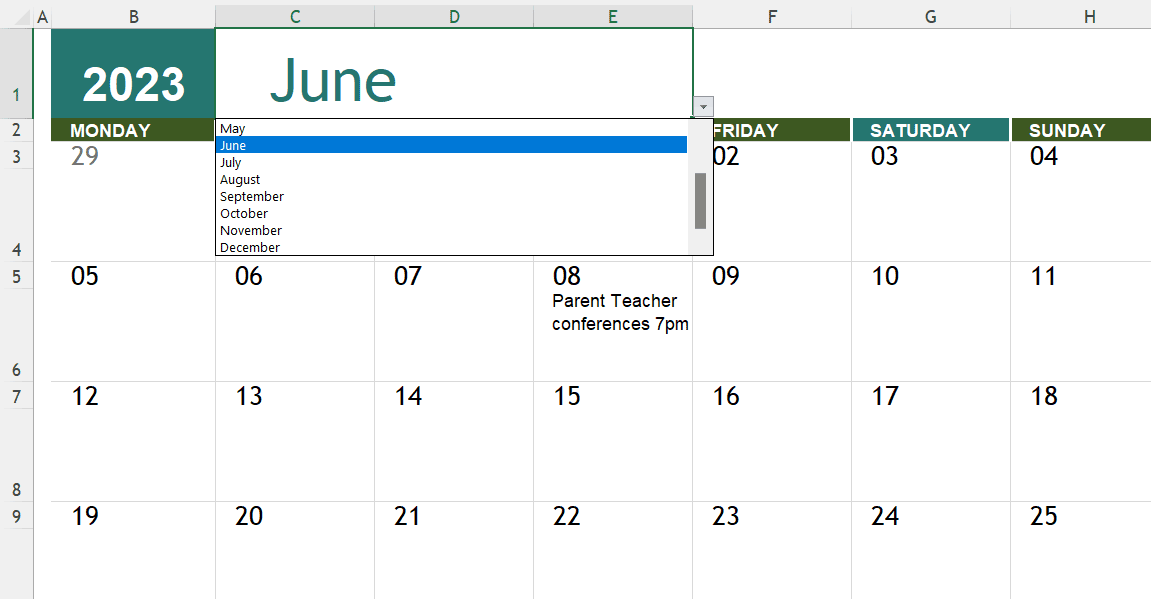
Once you confirm to create the calendar, the new calendar template will be opened in Excel. Here you can customize the calendar year and month by picking a new year number and month. The following screenshot shows a real example.
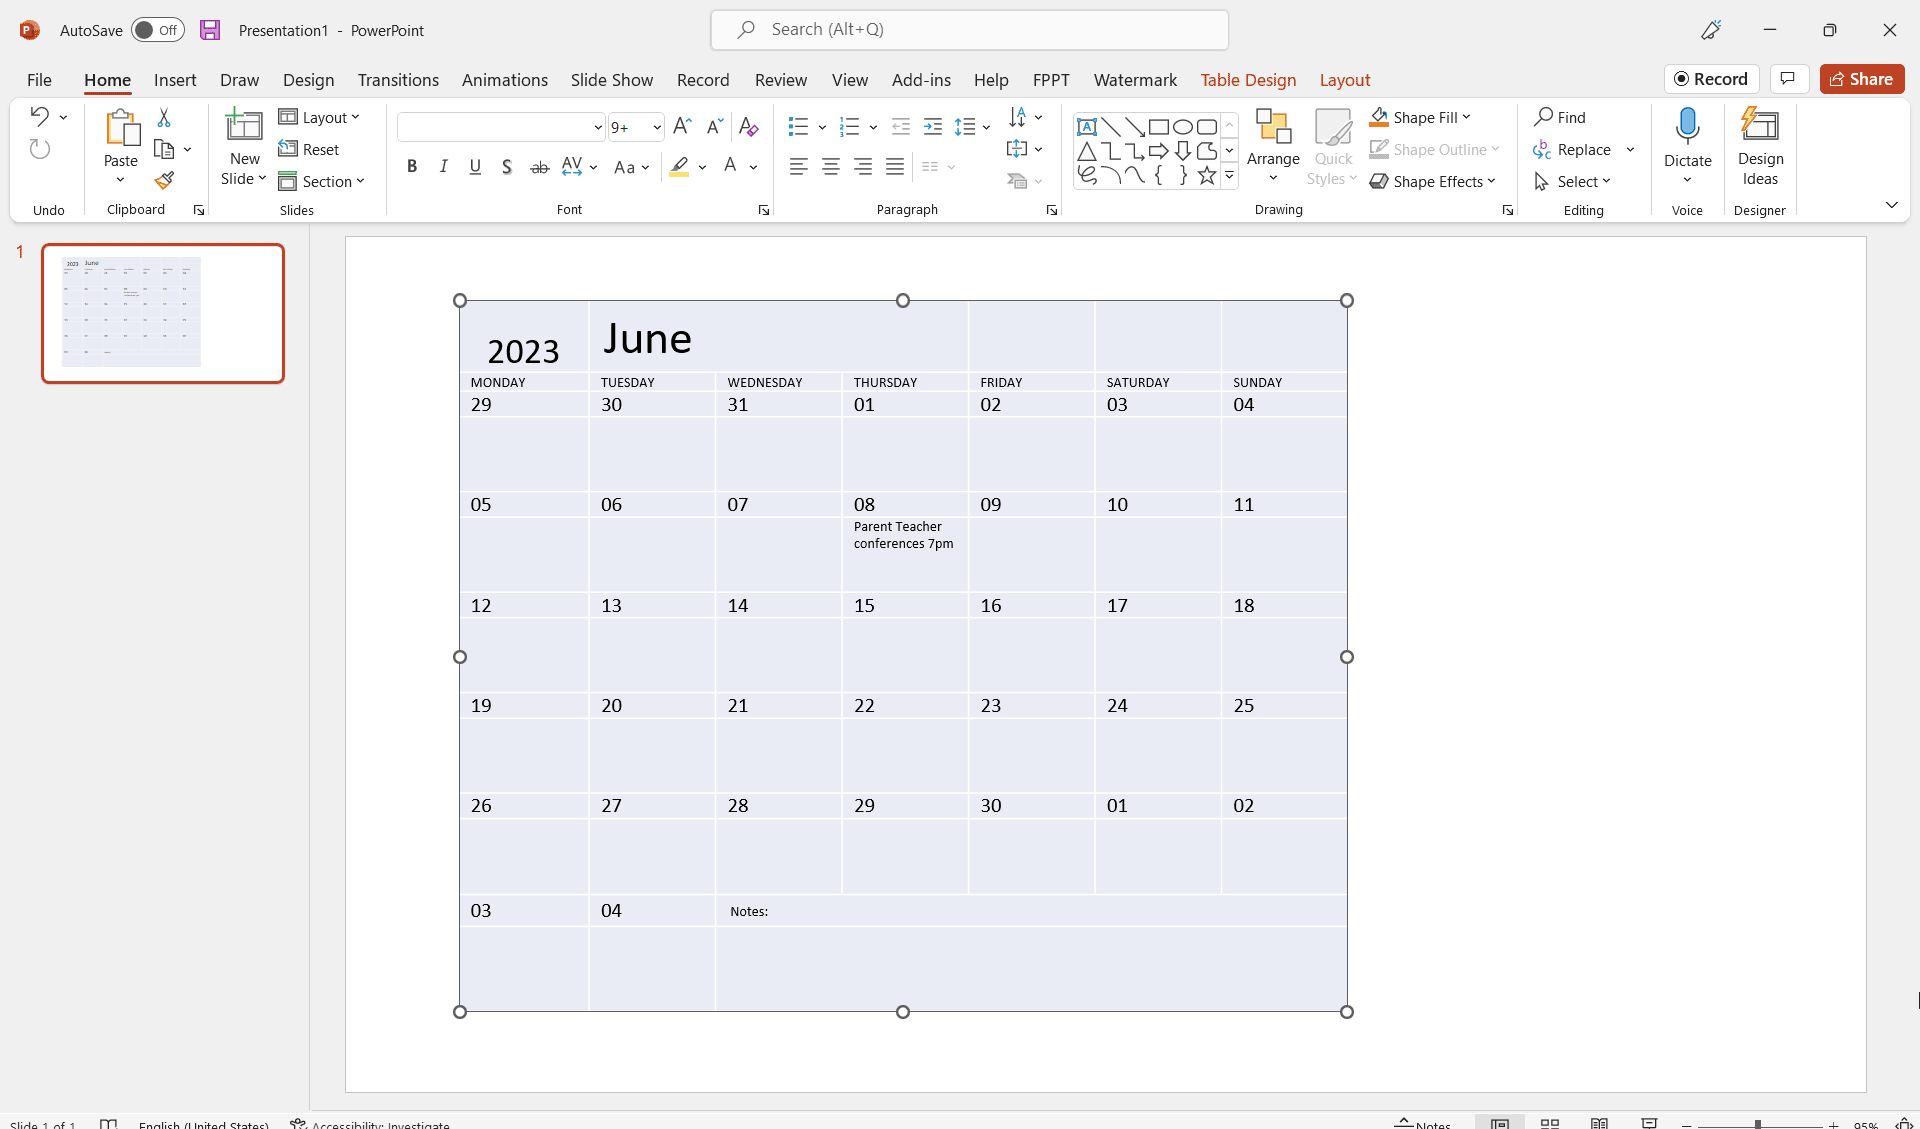
Now that you have created the calendar in Excel, you can copy and paste the Calendar in PowerPoint. The following screenshot shows an example after inserting the Calendar template into a PowerPoint presentation using the Excel approach.
Final thoughts
We have seen different methods for creating calendars easily. Imagine the hours spent designing the calendar versus a tool that can create it in just a blink of an eye. Again, the goal is to keep you from the rabbit hole of exploring several options online.
CalendarSlide is a friendly tool. It does not require the user to have a hardcore programmer or developer skill to create a calendar and integrate it into his or her PowerPoint slides. Developers did the heavy lifting so that users can create with confidence their desired calendars in just a minute.
Calendars should be our friend and not our enemy. We have several things to think about and designing calendars should not take so much of our mental energy. Let’s capitalize on the resources online in this digital age.
We make the days count and not count the days.
Start creating your personalized calendars with a free calendar slide maker tool.
Go to CalendarSlide