Creating a PowerPoint Handouts Template with a Company Logo
Last updated on November 19th, 2024
We have seen how to customize your corporate PowerPoint template to include your company logo, however if you want to prepare a PowerPoint template with handouts then you may be interested to put the logo also in the handouts that may be printed for the audience before a PowerPoint presentation or when you distribute your PowerPoint presentations as PDF for printing purposes.
Fortunately PowerPoint lets you customize the handouts template (aka Handouts Master in PowerPoint). Here we will show you how to put the company logo also in the handouts version of the PowerPoint presentation.
First, you need to go to View -> Handouts Master. This will open the handouts template where you can choose how many slides to show per page.

This will make available a new tab named Handouts Master where you can customize the view. For example, you can change the number of slides to see and change the slide orientation or the entire handout orientation. Also you can configure whether to include a hader, date, footer or page number on handouts. You can also change the fonts and effects and the background color.

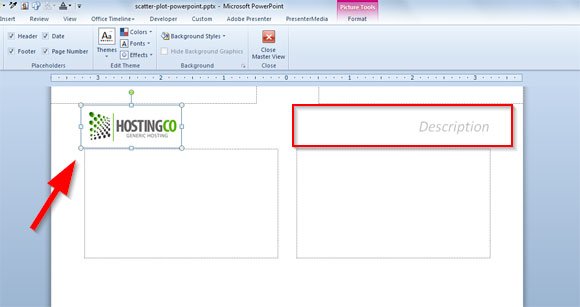
Also, here you can add a picture and insert a description (header text) for your handout. For example, you may be interested to insert a header & footer for your handouts template and this can be done from this view using a textbox.
To insert the logo, just go to Insert menu and click on Picture. Here you will need to choose the file from your hard disk and then once inserted you can move on the desired direction. Normally you would put the logo on the header, but in some presentations you may be interested to put it on the footer instead.
You can use the Handouts template to change:
- The header & footer for the handouts page.
- Add a text watermark in the handout pages (ie: draft template, confidential or top priority template).
- Put your company logo.

When you are ready designing your header and logo for PowerPoint handout template, close the master view and then you can print the handout from File -> Print.

As you can see, the logo appears in the print preview with the slides in our presentation. You can learn more about handouts in preparing effective handouts for presentations.
If you want to learn more, you can refer to our article on How to create handouts in PowerPoint.
