How to Make a Poster in PowerPoint
Last updated on November 14th, 2024
Posters are great to be used in classrooms and also for medical purposes or many other different applications. Creating posters in PowerPoint is easy but of course you need to get a training on how to design a poster in PowerPoint and find the right tools to do that.
In order to create a Poster in PowerPoint you need to start creating a new PowerPoint presentation.
Related: Download free PowerPoint Poster Templates ready for PPT and Google Slides.
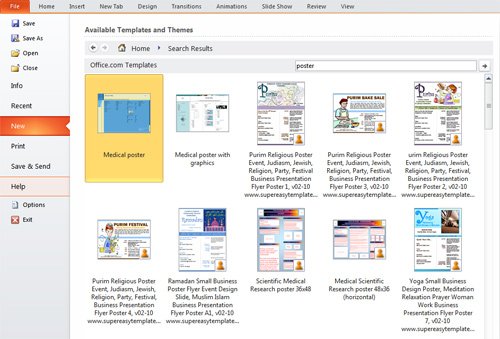
You can get free Poster PowerPoint templates by browsing the Office template gallery. If you want to try finding the poster template you can start browsing for poster templates in this gallery.

But sometimes these poster templates aren’t useful because you need a different format or layout.
How to Make a Poster in Microsoft PowerPoint
If you want to create a PowerPoint poster presentation from scratch then making a new PowerPoint presentation is a good starting point.
Once we start a new PowerPoint presentation we need to find the Design tab on top in Microsoft PowerPoint (in previous versions of PowerPoint there was a Page Setup option under File menu). Once you find the Design tab, then click on Page Setup option and you will be prompted to choose a Slide size. Then you can enter a custom poster size, for example 48″ width x 18″ height. And don’t forget to set it as landscape if you want it horizontally.

Poster frames have different poster sizes that vary from a wide range of options. Depending on the printer and place where you want to show your poster, you’d choose from one poster size or the other.
Enter the Height and Width of your poster. Please be aware that PowerPoint’s maximum size is 52”; therefore to produce a PowerPoint poster with dimensions larger than 52”, both dimensions are entered at half the desired size. For example, for a 44” x 66” poster, you would enter 22” in the box for height and 33” in the box for width, and click OK. The poster’s size will be doubled during the printing phase to bring it up to 44×66 inches as desired. Important: The printer’s maximum size paper roll is 44”, meaning that one of your dimensions, width or height, may not exceed 44”. Also, other roll sizes are 24”, 36” and 42”, so it is best to set either the height or width of your poster to one of these measurements.
What is the standard poster size?
Here is a list of poster sizes available for you to use. There are some ISO format sizes for posters which you may choose from as well as other custom poster sizes available. Some printers can print larger poster size, but that will depend if it is a digital printer or other kind of printer capable to print large documents. Here is a list of standard poster sizes ISO from Wikipedia.
| Format | A series | B series | C series | |||
|---|---|---|---|---|---|---|
| Size | mm × mm | in × in | mm × mm | in × in | mm × mm | in × in |
| 0 | 841 × 1189 | 33.11 × 46.81 | 1000 × 1414 | 39.37 × 55.67 | 917 × 1297 | 36.10 × 51.06 |
| 1 | 594 × 841 | 23.39 × 33.11 | 707 × 1000 | 27.83 × 39.37 | 648 × 917 | 25.51 × 36.10 |
| 2 | 420 × 594 | 16.54 × 23.39 | 500 × 707 | 19.69 × 27.83 | 458 × 648 | 18.03 × 25.51 |
| 3 | 297 × 420 | 11.69 × 16.54 | 353 × 500 | 13.90 × 19.69 | 324 × 458 | 12.76 × 18.03 |
| 4 | 210 × 297 | 8.27 × 11.69 | 250 × 353 | 9.84 × 13.90 | 229 × 324 | 9.02 × 12.76 |
| 5 | 148 × 210 | 5.83 × 8.27 | 176 × 250 | 6.93 × 9.84 | 162 × 229 | 6.38 × 9.02 |
| 6 | 105 × 148 | 4.13 × 5.83 | 125 × 176 | 4.92 × 6.93 | 114 × 162 | 4.49 × 6.38 |
| 7 | 74 × 105 | 2.91 × 4.13 | 88 × 125 | 3.46 × 4.92 | 81 × 114 | 3.19 × 4.49 |
| 8 | 52 × 74 | 2.05 × 2.91 | 62 × 88 | 2.44 × 3.46 | 57 × 81 | 2.24 × 3.19 |
| 9 | 37 × 52 | 1.46 × 2.05 | 44 × 62 | 1.73 × 2.44 | 40 × 57 | 1.57 × 2.24 |
| 10 | 26 × 37 | 1.02 × 1.46 | 31 × 44 | 1.22 × 1.73 | 28 × 40 | 1.10 × 1.57 |
1 sheet 27″ X 40″ Posters : printed on paper stock, is the standard poster used in U.S. theaters at this time (around 1985 to present.)
1 sheet 27″ X 41″ Posters : printed on paper stock, was the standard size poster prior to 1985. These posters were sent to the theaters folded.
British Quad 30″ X 40″ Posters: printed on heavier card stock and paper stock. Image same as 1-sheet. These posters are usually from Britain, which is why the posters are named: “British Quad Posters.”
Half Sheet 22″ X 28″ Posters: Printed on heavier card stock, these posters date back to 1910 and were phased out in the 80’s.
Insert 14″ X 36″ Posters: Printed on heavier card stock, these posters date back to 1910 and were phased out in the 80’s.
3 Sheet 41″ X 81″ Posters: Printed on paper, these posters date back to 1912 and were phased out in the 80’s.
6 sheet 81″ X 81″ Posters: Printed on paper.
Japanese B0 Posters:Size 40″ x 80″
Japanese B1 Posters:Size 29″ x 40″
Japanese B2 Posters:Size 20″ x 29″
Japanese B3 Nakazuri Posters:Size 14″ x 20″
Japanese B4 Posters:Size 10″ x 29″
Designing a new PowerPoint Poster Presentation
Once you have the right paper size for your poster presentation, you can start designing your PowerPoint poster. At Free PowerPoint Templates we publish poster examples and free Poster templates that you can download but if you are interested to design your own poster presentation, then here we will try to give you some ideas on how to achieve this.

First, you can start adding some styling for the header and footer, but the most important point is to design the content. You can get a paper offline and add some callouts in a paper prior to designing it in the screen. Just create a poster presentation draft in a small piece of paper and then these ideas will be converted to a digital Poster in PowerPoint.
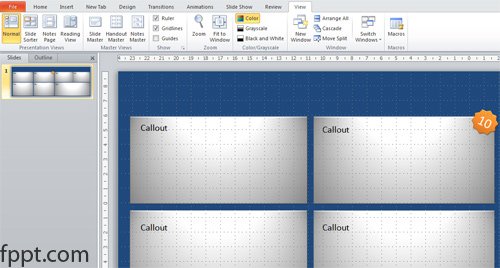
Then you can start drawing some callouts in the PowerPoint slide. You can also add some gradient effects to the callout for example as shown in this image below.

You can also use various shapes in PowerPoint to decorate your callouts or add new PowerPoint charts from Excel to a particular callout.

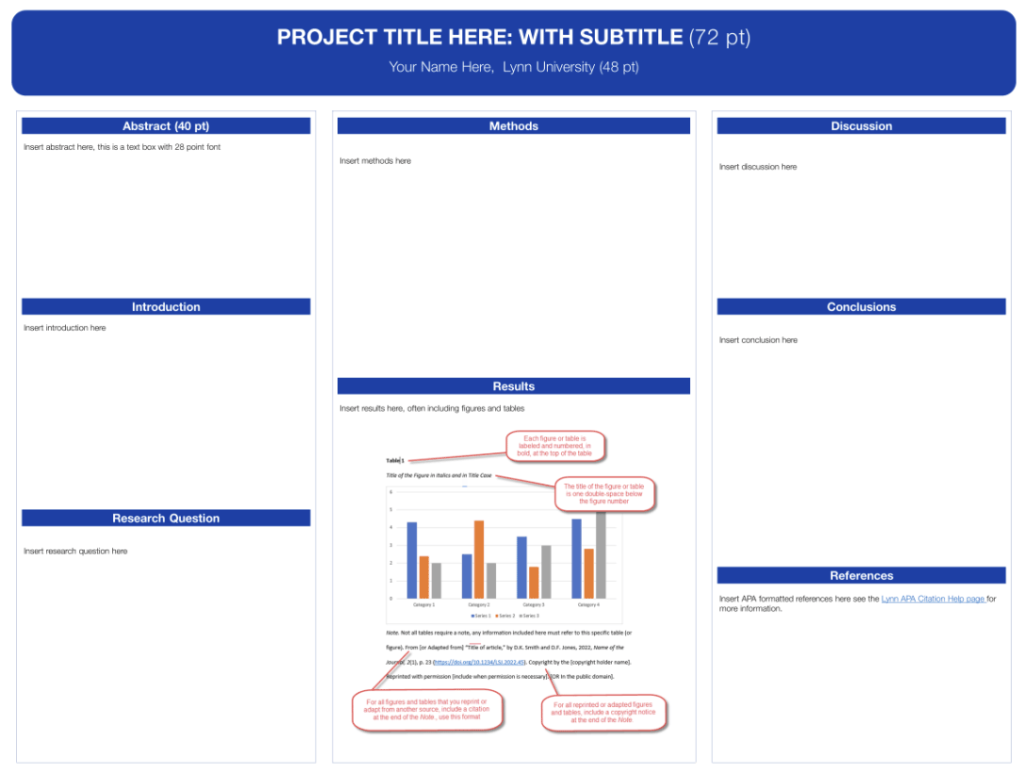
Example of 48″x36″ Academic Poster Presentation Created in PowerPoint
In this poster presentation, we can find the typical poster sections (these may vary, discuss with your professor or conference organizer to find out the required sections). But in this case, the poster follows the IMRaD format (“IMRaD” format refers to a paper that is structured by four main sections: Introduction, Methods, Results, and Discussion or Conclusion). Other sections include:

- Abstract
- Introduction
- Literature Review
- Research Question, Statement, Hypothesis
- Methods
- Results
- Discussion
- Conclusion
- Future Research
- Funding Acknowledgement
- References (APA format Poster Presentation)
Alternatively, you can download presentation poster templates with editable components and fields, like the free scientific poster templates for PowerPoint,
Conclusions
In order to organize your slide you can use the Ruler in PowerPoint or configure the gridlines. Both are very useful tools to align boxes in the slide design. Also, you can use the Size and Position options accessible by right clicking in an element. Creating a Poster in PowerPoint can be used to explain a research or make a scientific poster for your University.
