How to Create a Timeline in PowerPoint using Shapes & Tables
Last updated on June 20th, 2024
We already show you how to create timelines using a PowerPoint add-in. But sometimes you may need a simple basic timeline template for your PowerPoint presentations, and here we will show you how to create a basic timeline using just shapes and a table in PowerPoint. You can also create timelines using SmartArt in PowerPoint.

So, how to create a timeline in PowerPoint using shapes?
First, you’d need to open a blank presentation or download any of our free timeline PowerPoint templates and draw a new table in PowerPoint.
You can apply some styles and colors using the design styles for tables. This will help you to make impressive PowerPoint presentations and combine nice tables.
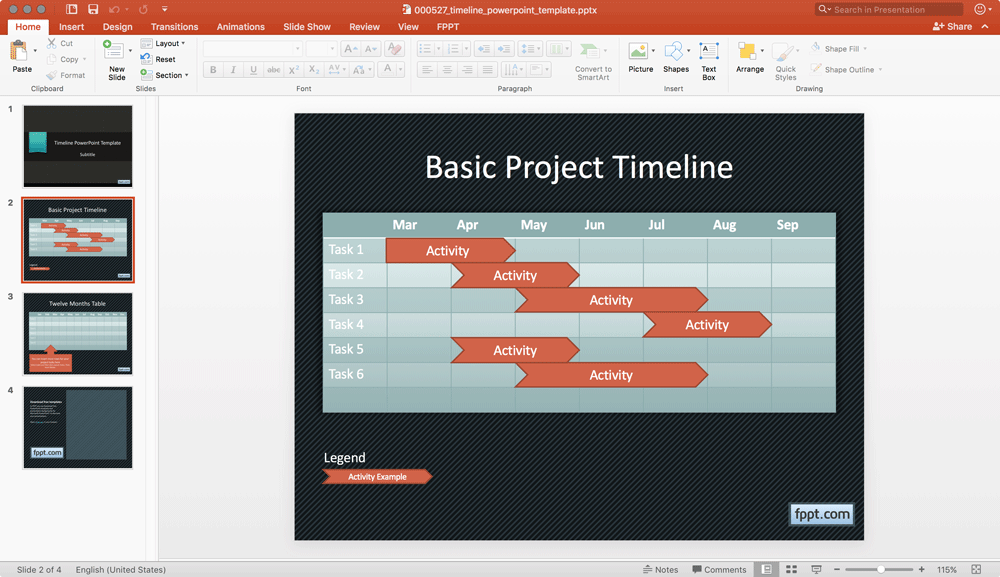
Next, you are ready to draw some shapes. Here we will use two shape designs: Pentagon and Chevron shapes in PowerPoint. These shapes will help us to draw activities. The Pentagon shape is helpful for the initial activity since it only has an arrow style for the right side. Chevron shape in PowerPoint is useful for the internal activities since have an arrow effect on both sides of the shape.
Pentagon shape loos like this:

Chevron shape looks like this:

Finally we draw the shapes above the table so we can assign an activity for each task in the timeline. You can adapt this design to your timeline needs, for example if you are creating a timeline Gantt diagram this will look different, you can add some meeting or milestones for your project timeline. But this is also helpful if you need to create other timeline presentations or create timeline templates like inventions timeline PowerPoint templates or technology timeline PowerPoint templates.
Here you can see the final output.

If you need to create a timeline template like this one, feel free to contact us and we can send you the editable .ppt file or provide a prompt so you can generate it using AI.
