Apply animation effects to bullets of text
In order to apply animation effects to bullets of text you can use the animation options available in PowerPoint. Let’s see how we can apply animation in PowerPoint for individual bullets of text in a bullet list.
First, we need to create the bullets of text as a list. You are a pro doing this, just add some text in a list and use the right indentation.
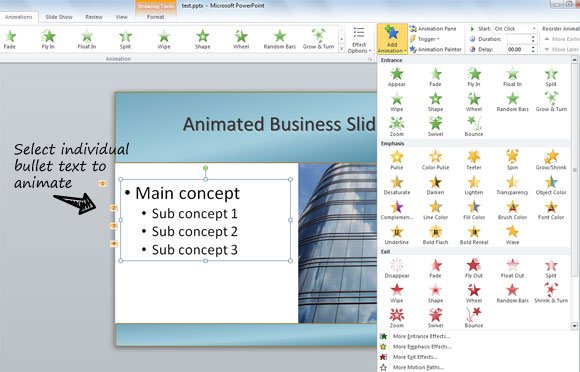
Then, select the first line of bullet of text and once the text is selected go to the Animation tab in PowerPoint and press the Add Animation button as shown in the picture below.

Here you can see a lot of different animations that can be used as entrance, emphasis or exit. You can use entrance animations in bullet of text to define the animation used when the text appears for the first time while running the presentation. You can use the animation effects also in PowerPoint templates in case you want reuse the template files in future presentations.

Entrance animations include some nice effects like Appear, Fade, Fly In, Float In, Split, Wipe, Shape, Wheel, Random Bars, Grow and Turn, Swivel, Bounce and Zoom.
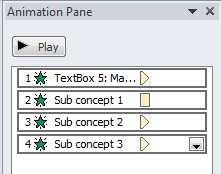
Once you apply the first animation effect to the first line in the bullet list, you can select the second line in the bullet of text and then repeat the same steps. In the image you can see that there are some small numbers as annotations at the left of the bullet of text. This explain the order of the animations. You can configure advanced animation settings or control the order of animations in the bullet list by changing the settings on Animation Panel.
