5 Printing Tips for Word Documents
When you’re using Microsoft Word, there would be times when you need to create documents for printing. While many today opt to go paperless and use technology that allows you to share your documents online, there are still those who prefer the traditional way and print a hard copy of their Word documents. Here are 5 Printing Tips for Word Documents.
If you’re one of those people who still prefer printed Word documents over digital content, then you also know that there are times when printing can be challenging.
Sometimes, your printed Word document doesn’t really look the same as the ones you made in Word. You may not always get printouts that look the same or the way that you want them. To help you out, here are some helpful printing tips to help you make the most out of printing Word documents. In this article, you will learn how to print a Word document and some of the best tips for printing these documents.
1. Preview Before Printing
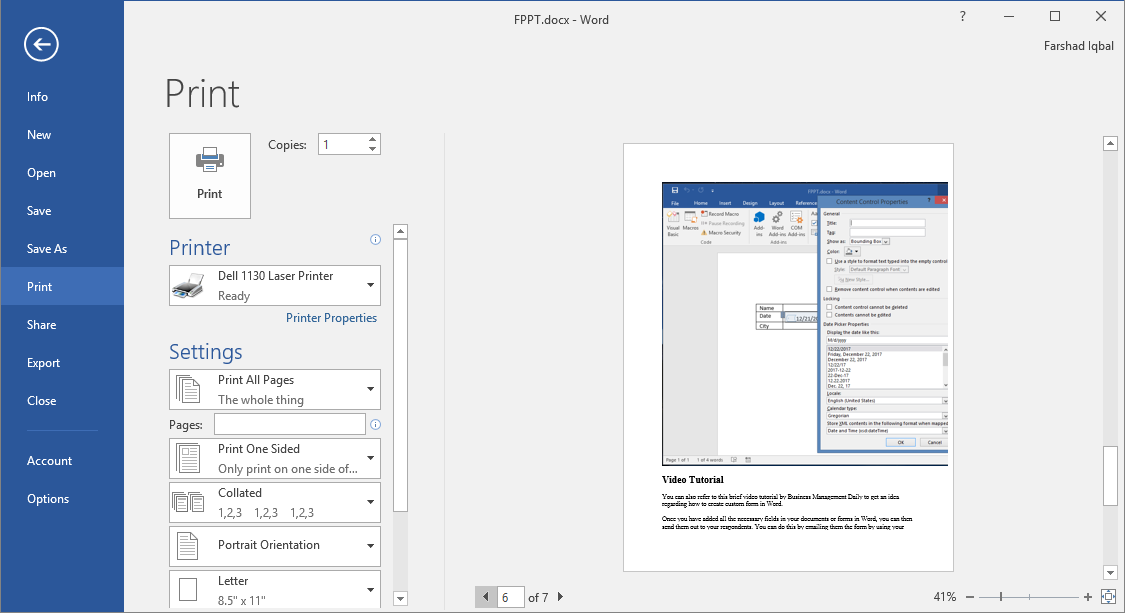
To make sure that your document gets printed the exact way that you want it to look, don’t forget to use Print Preview before printing. This function helps avoid nasty and unwelcome surprises that can end up wasting a lot of your time, paper, ink, and money.
By previewing your document before printing, you have a chance to take a look at the exact way your document will look like before it gets printed. This way, you can also see if you have made any errors or if you need to add any last-minute changes to the document.
The print preview also allows you to adjust your page layout and print settings. You can change your print orientation, margins, and paper size to optimize the look of your documents.
To preview your document, just go to File ->Print. This will automatically give you a preview and you can scroll through multiple pages of your document and change printer settings that will also apply to your document.

2. Use Smaller Margin Widths
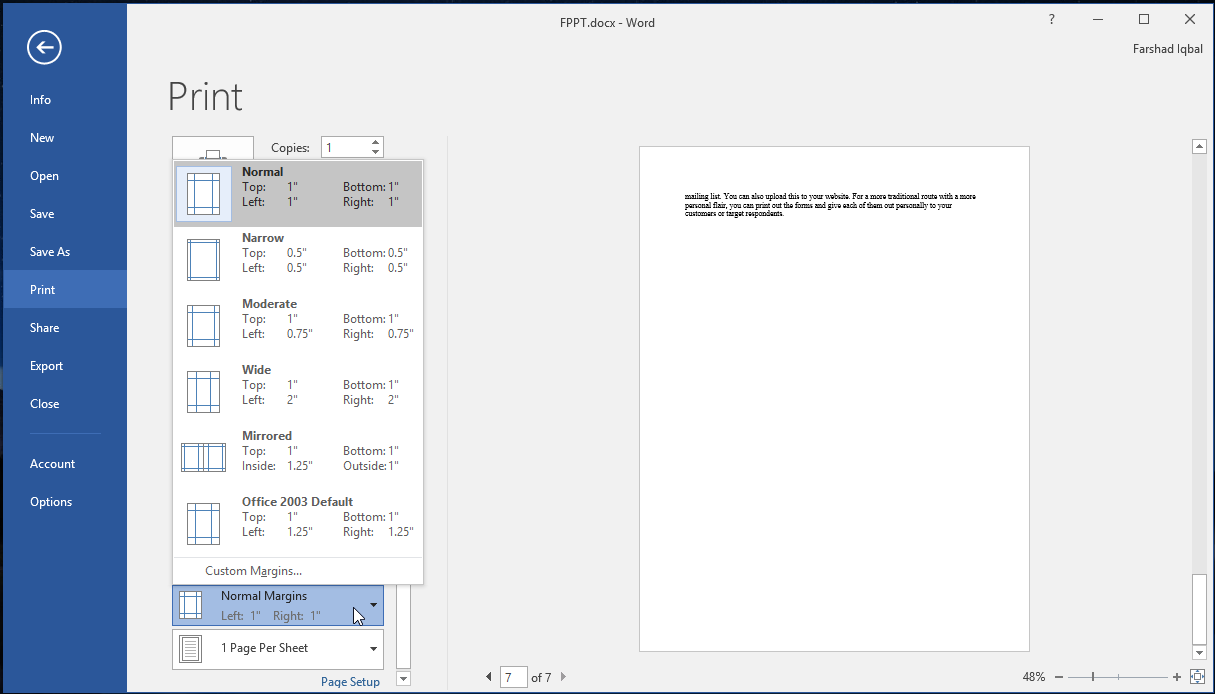
To maximize the printing surface of your document on paper, you can use smaller page margins. To do this, you can go to Settings. Here, there are 3 premade margin choices: Normal, Narrow, and Moderate. Of course, you can still customize your margins depending on your needs or preferences.
Just remember, using small margins can cut off text from your document, as these may not be included in the printer surface you have set.

3. Save on Paper by Printing on Both Sides
As more people are trying to go green and opt for going paperless, there may be times that you really had to print your documents. When this happens, you can still save as much paper as you can by using the double-sided printing option in Word.
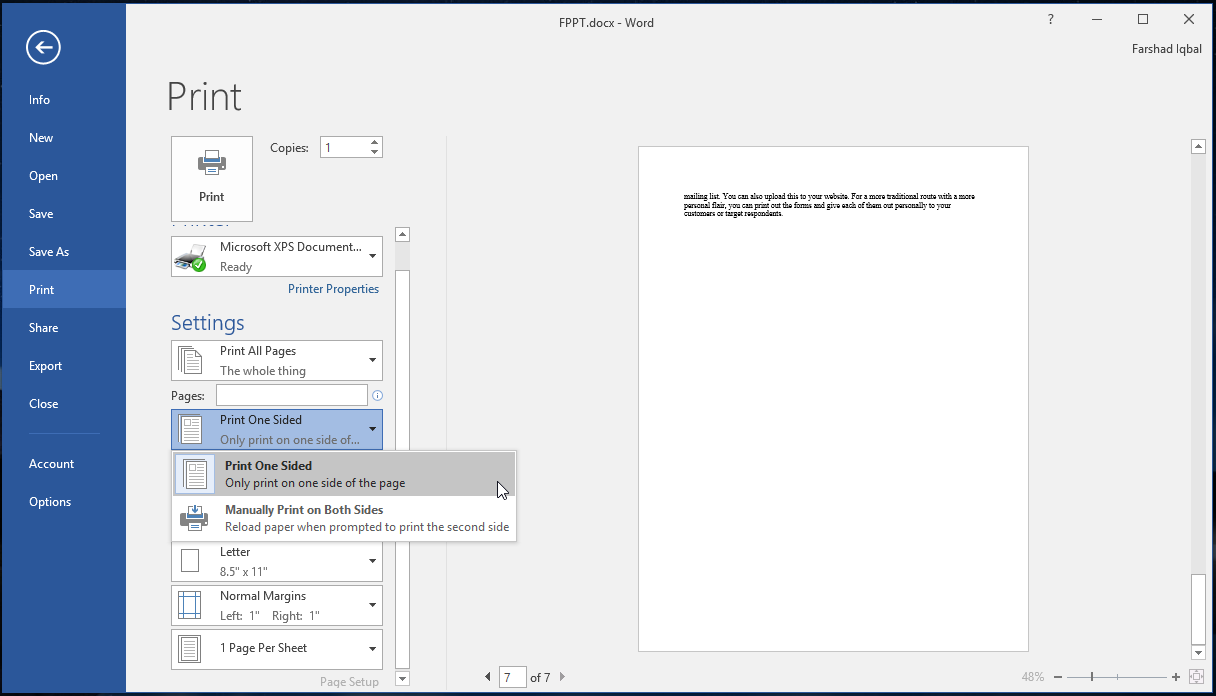
To do this, go to the option under the Pages menu. Here, the options include Print One Sided, and Manually Print on Both Sides. By selecting the latter option, you can print on both sides. Take note, however, that you are the one who has to reload the other side of the printed paper for double-sided printing.
There are printers that can allow you to print on both sides automatically without the need for you to manually feed the paper. This will include the option “Print on Both Sides” to show under the Pages submenu.

4. Take Note of Markups
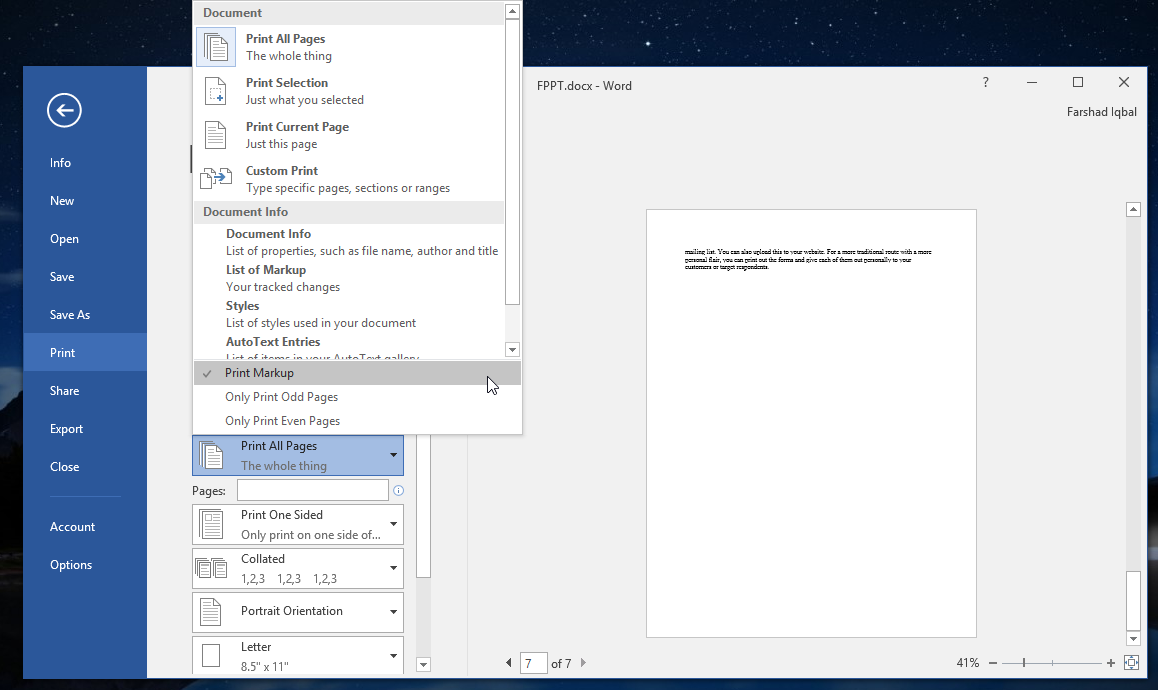
Track changes or Comments may show up in print if you’re not careful. Unless you are printing documents for review, editing, or proofreading purposes, then these markups can be included in your printout. Under Settings, click on Print Markup to show it. If you want to hide markups or if you’re printing a final version, then you can uncheck this option.

5. Print Test Copies
It pays to print test copies to be sure of what your printed document will look like. This is very helpful especially when you’re printing a lot of documents or a final copy of your document. This is also good if your document includes graphics and designs. This will allow you to make necessary adjustments to your document, formatting, or printer settings.
Do you know of a good printing tip that you would like to share with us? Tell us about your tip by leaving a comment below.
