How to Make 3D Shapes in PowerPoint
Last updated on October 25th, 2024
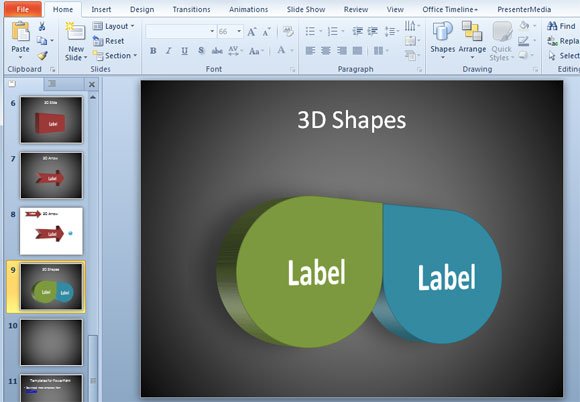
Creating 3D Shapes in PowerPoint can be really easy using the common 2D shapes that are available in the shapes collection and then customizing the options (Format Options). We have seen how to convert 2D shapes to 3D in PowerPoint but let’s revisit the topic and explain how to make awesome 3D shapes in PowerPoint just by using the original shapes available in PowerPoint.

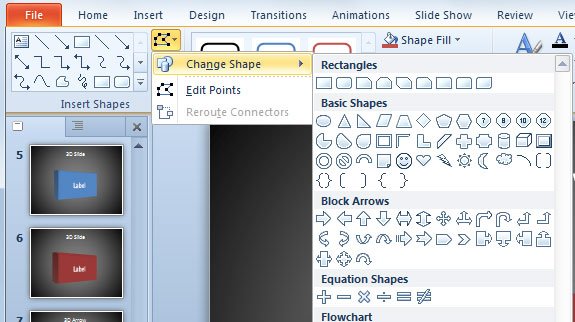
The trick here is to use the built in feature Change Shape. This will help to change any shape that is already embedded in PowerPoint by any other existing shape. You can download our 3D shapes PowerPoint template and then use any other shape from the collection.

In this case you can duplicate the shape and then apply a similar style or effect to achieve great 3D results. Notice that you can keep the perspective and shadow styles and then combine multiple shapes to use in your 3D PowerPoint presentations. This can be really helpful if you want to make 3D slides in PowerPoint. You can use basic shapes like rectangles, or even other complex shapes like flowchart shapes or block arrows.

You can use your imagination to achieve great results. For example, here we have replaced the existing shapes with arrows.

Far from being challenging, creating 3D Shapes in PowerPoint can be really easy by changing the perspective degree and shape options. Alternatively, you can convert your 2D shapes to 3D in PowerPoint following the procedure we explained in the article.
